March 10, 2009 Moss
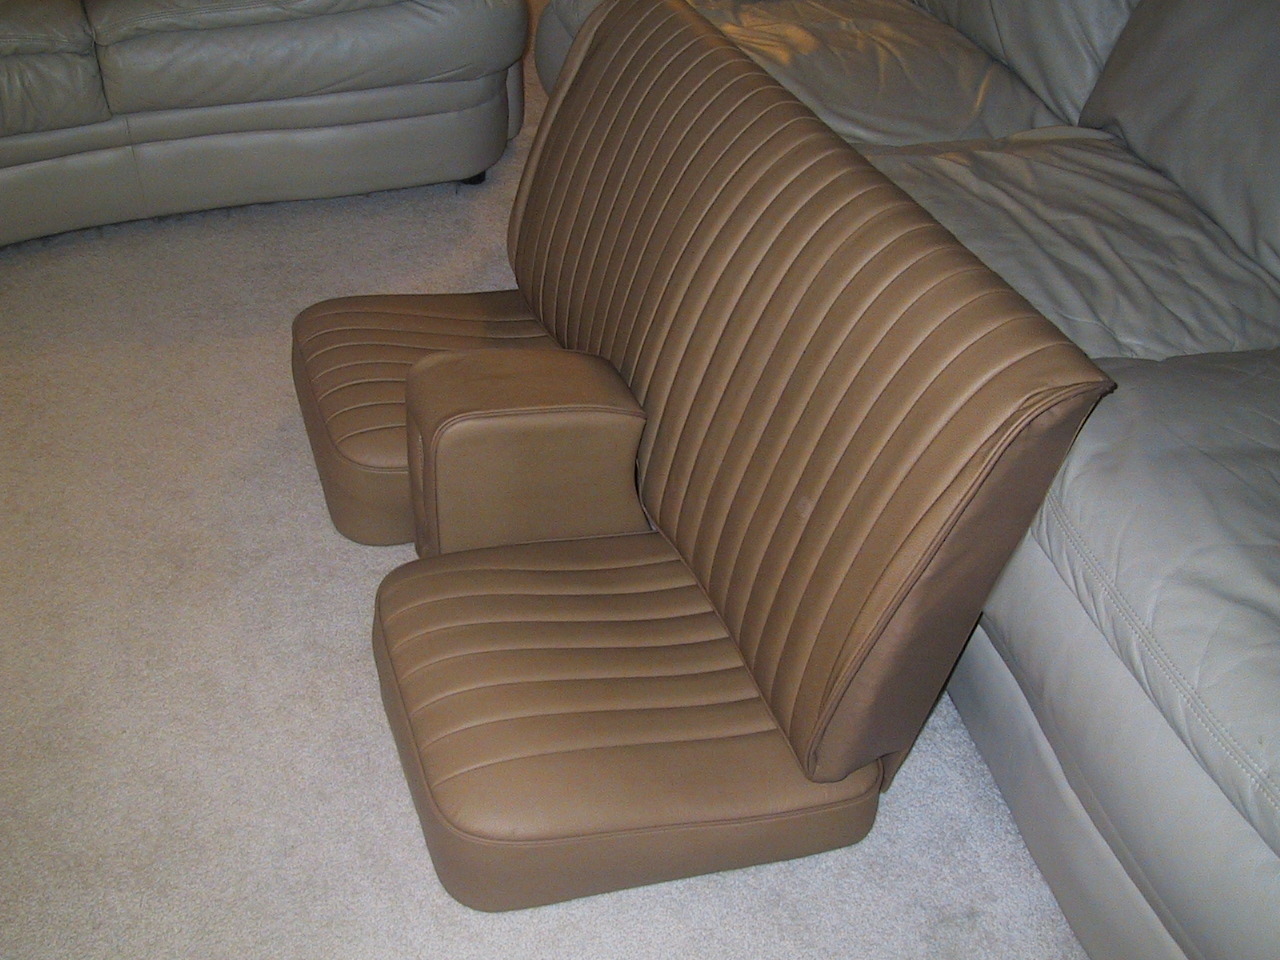
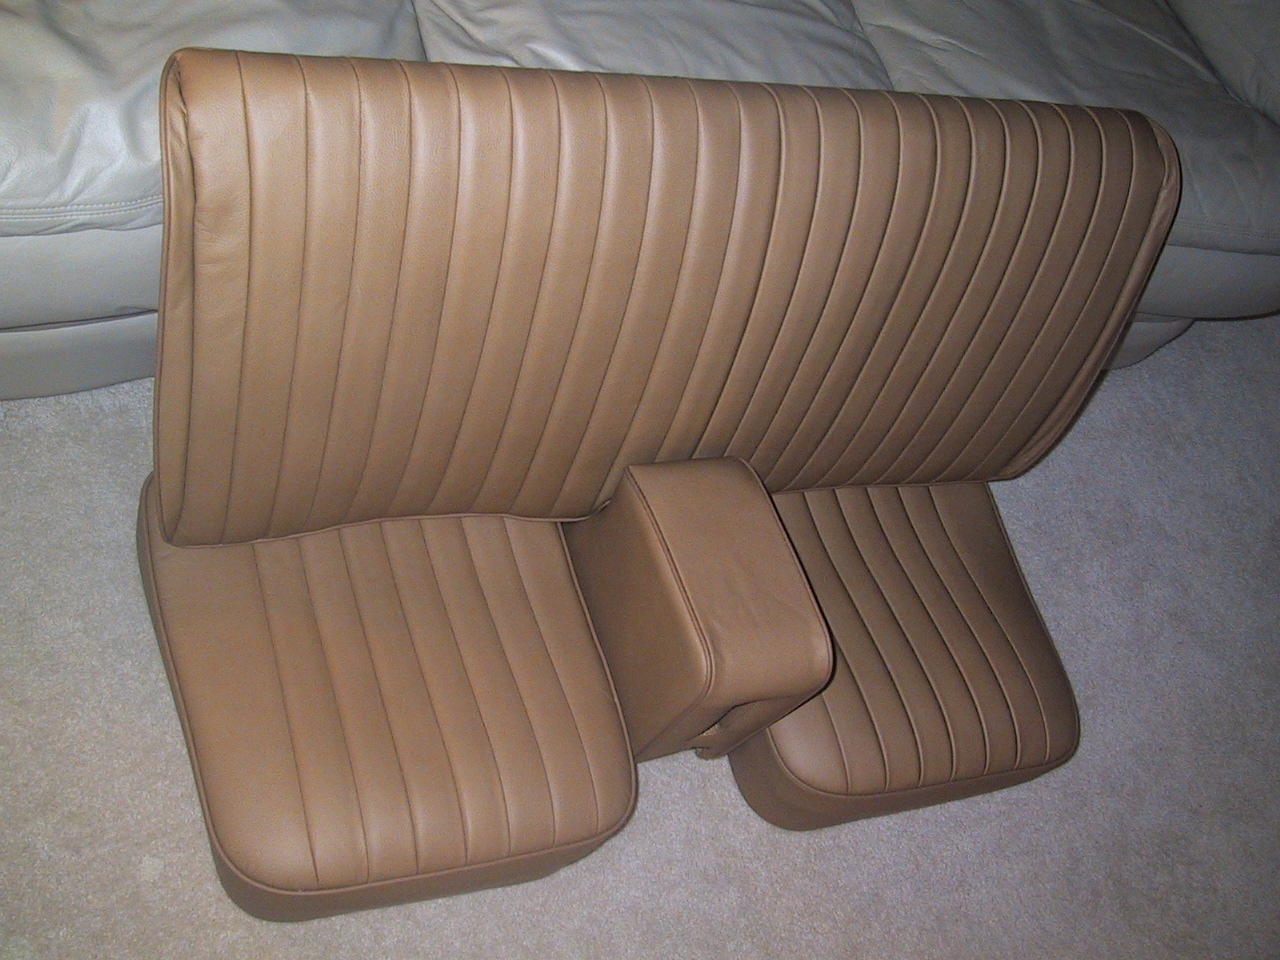
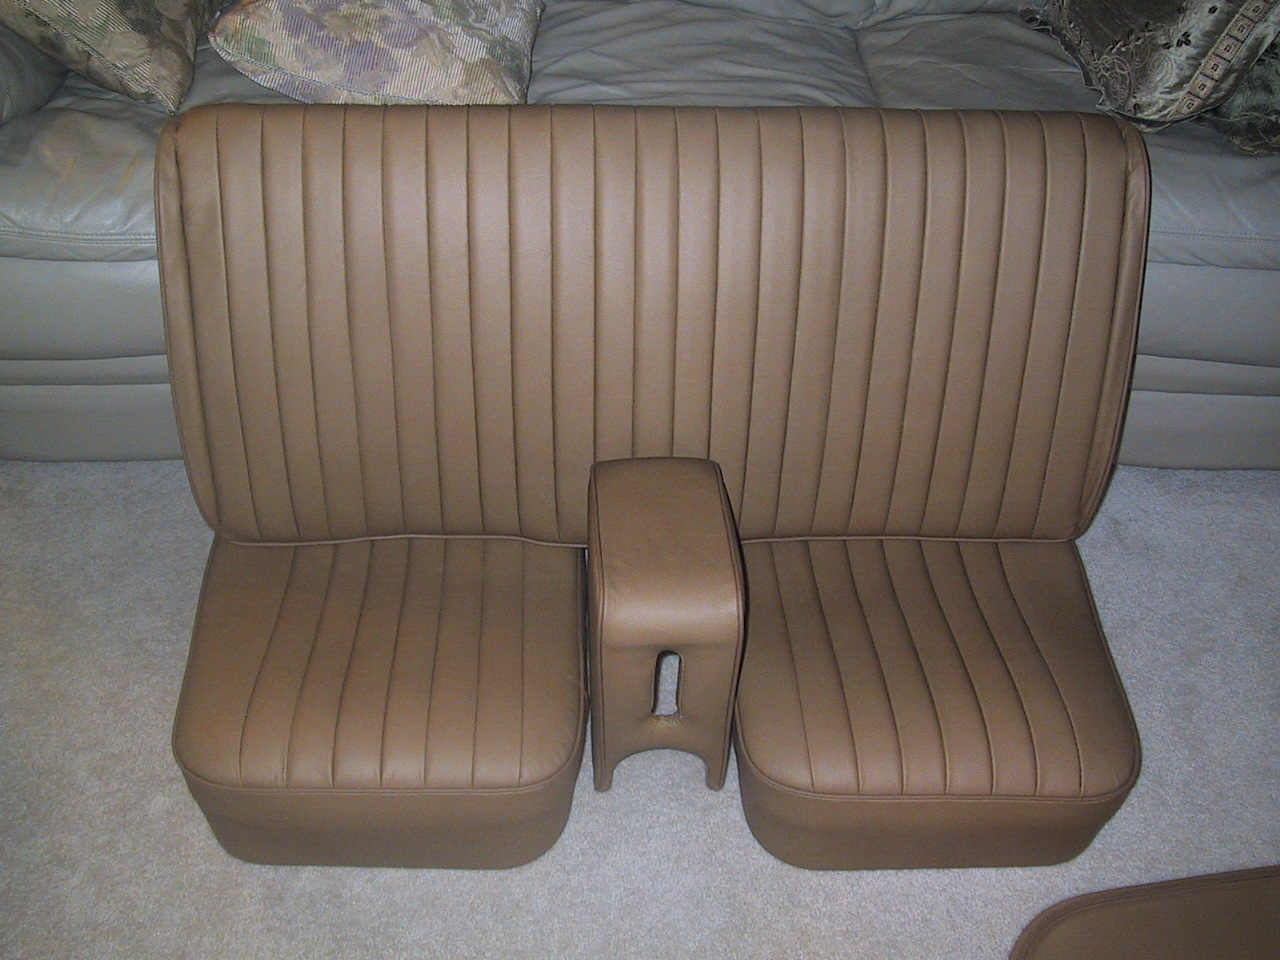
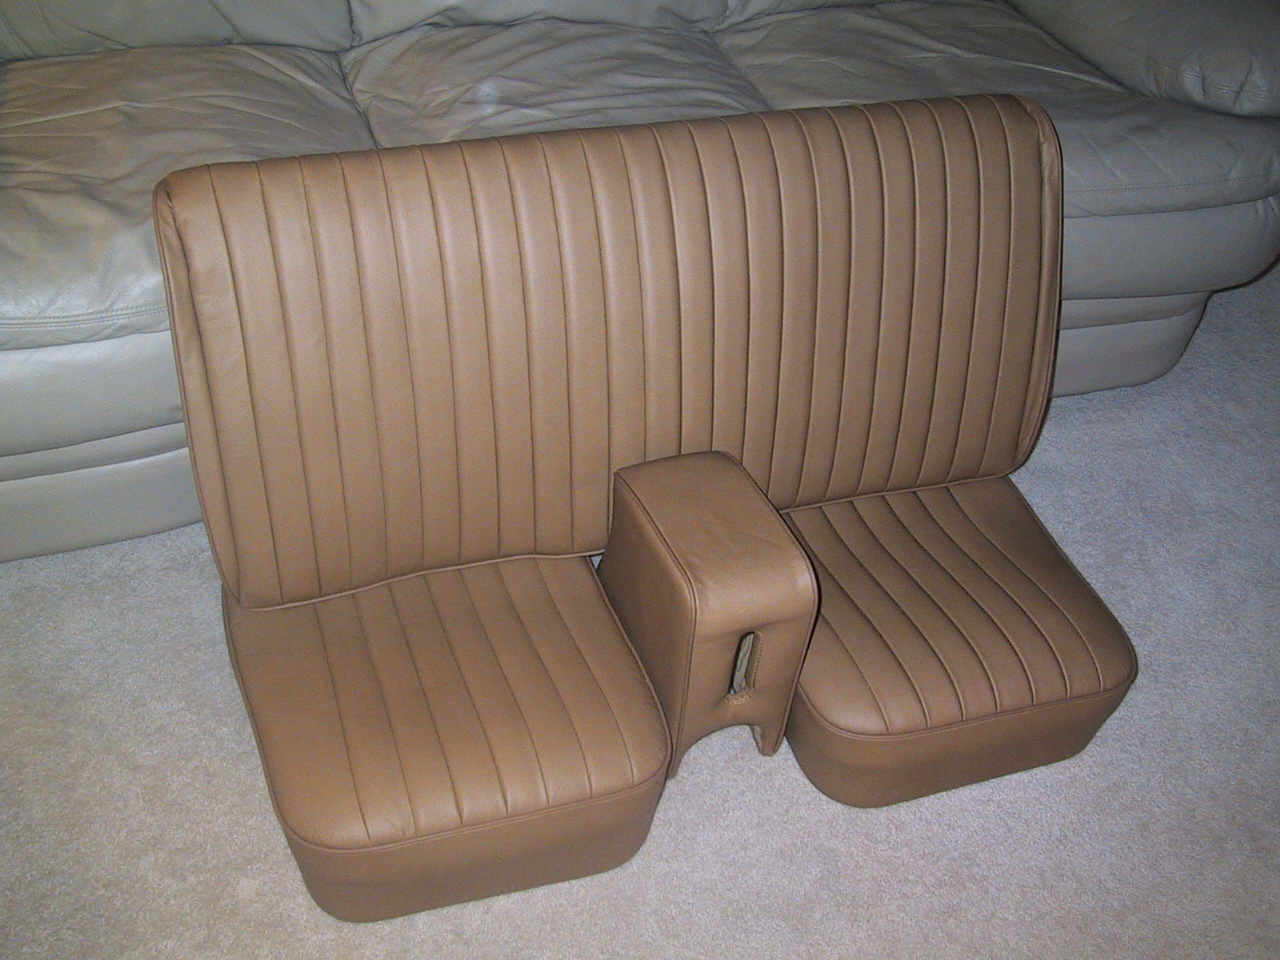
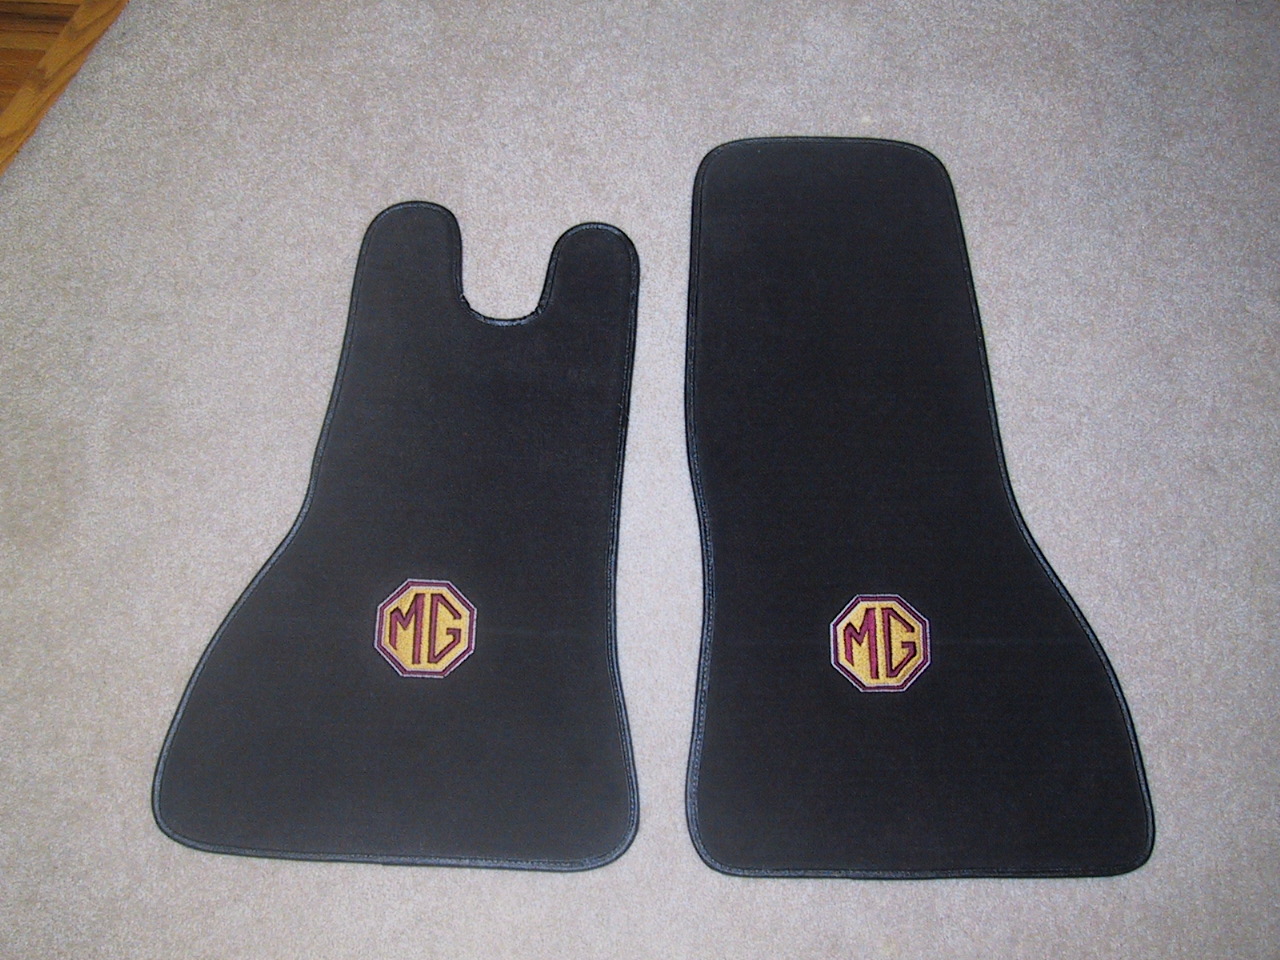
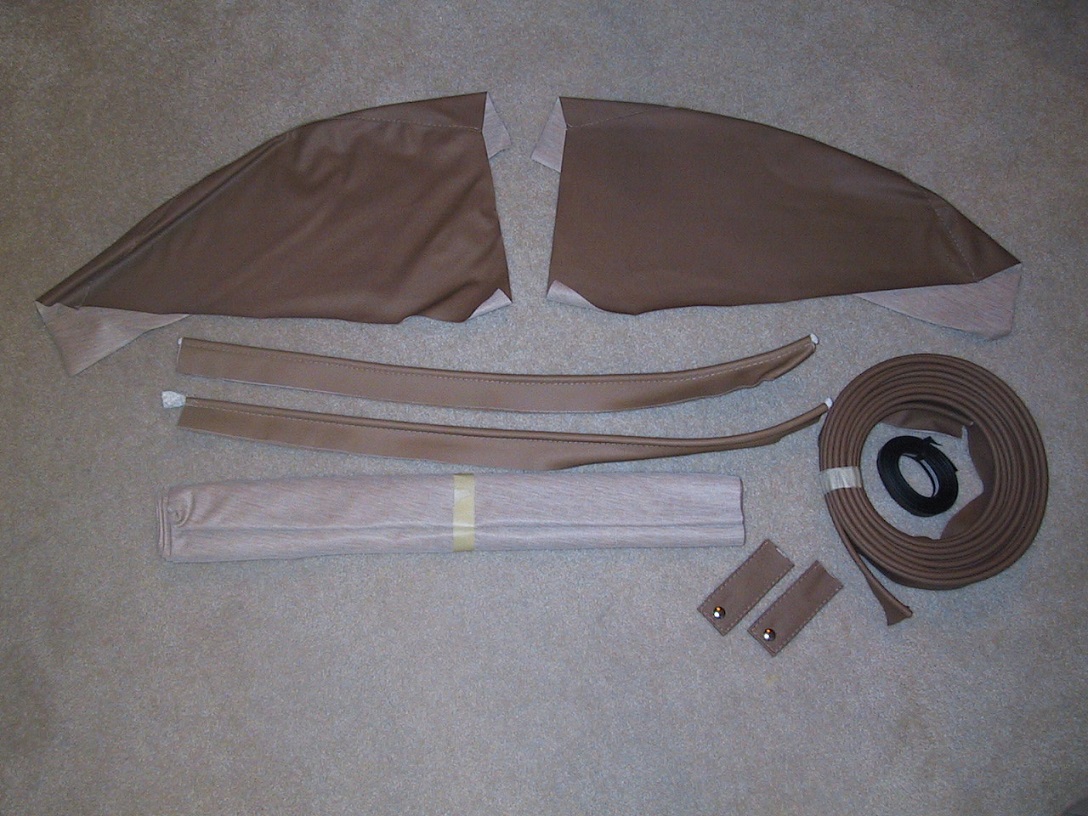
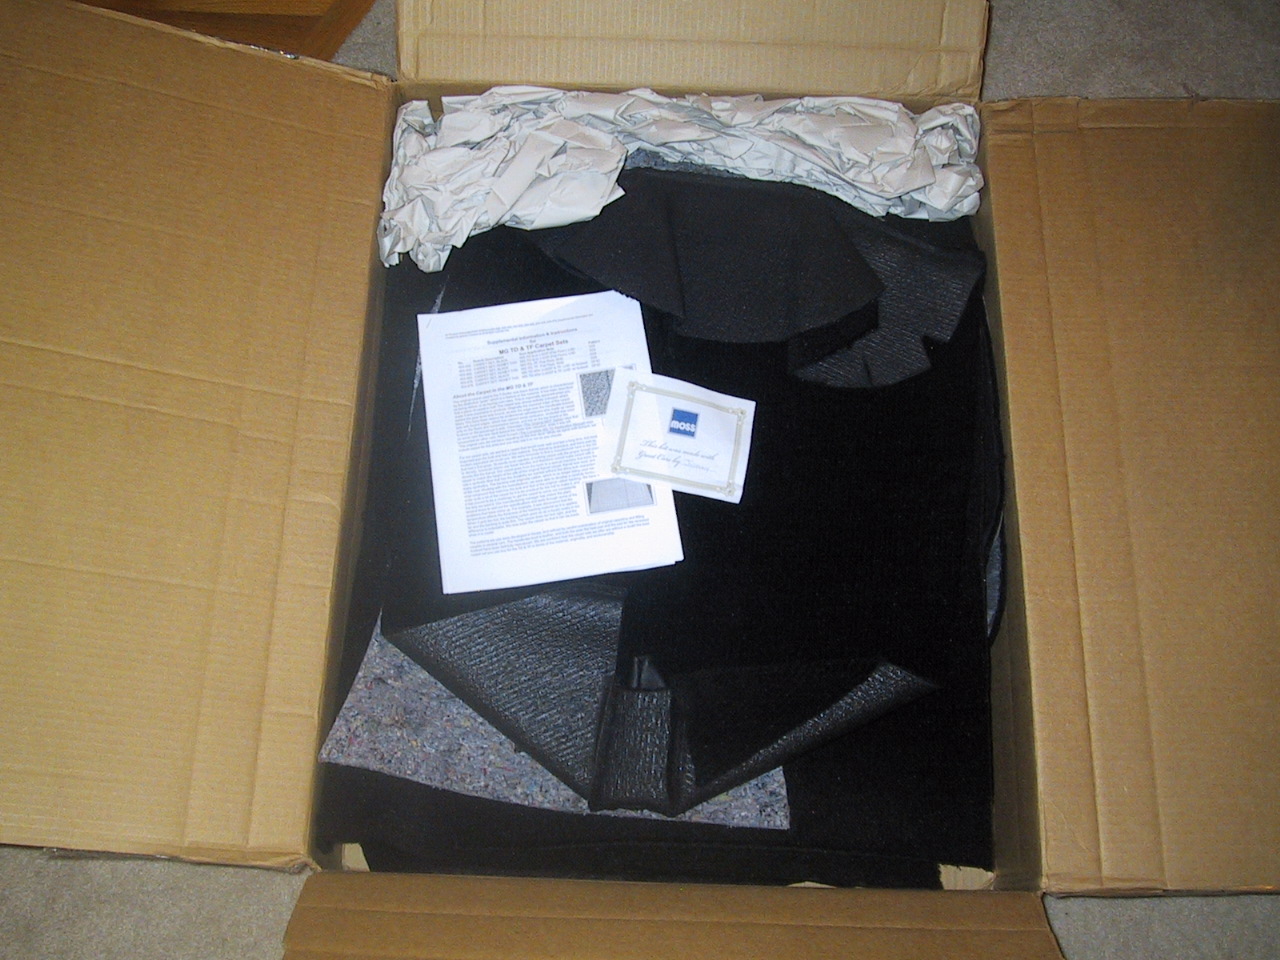
interior kit freshly unpacked
Shown above is the complete leather seat kit, complete leather
side panel and trim kit, carpet kit & plush logo floor mats.
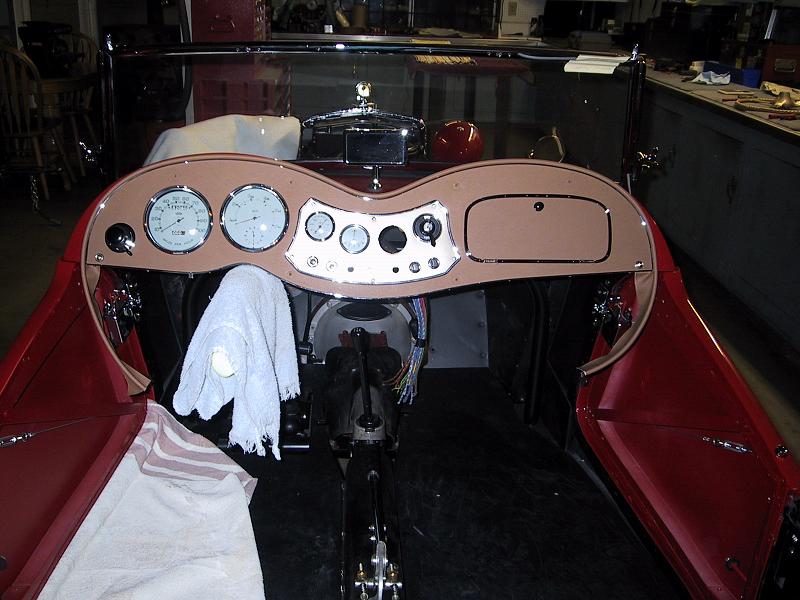
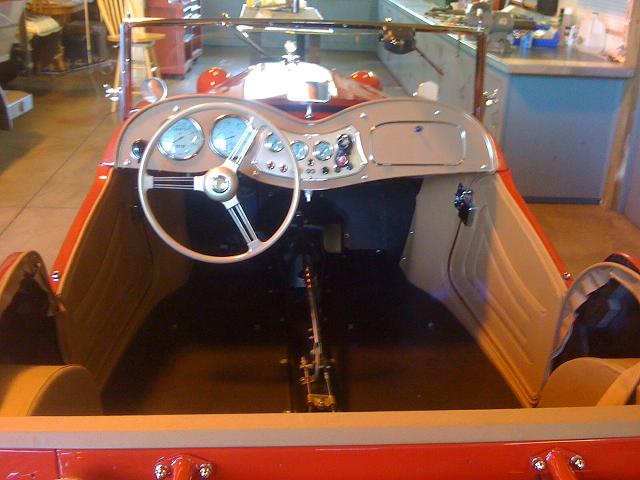
 December 12, 2010 Instrument
panel almost complete
December 12, 2010 Instrument
panel almost complete
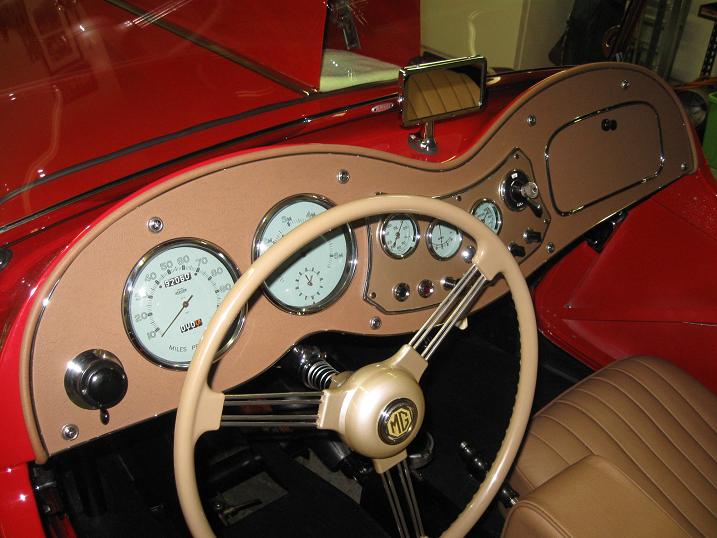
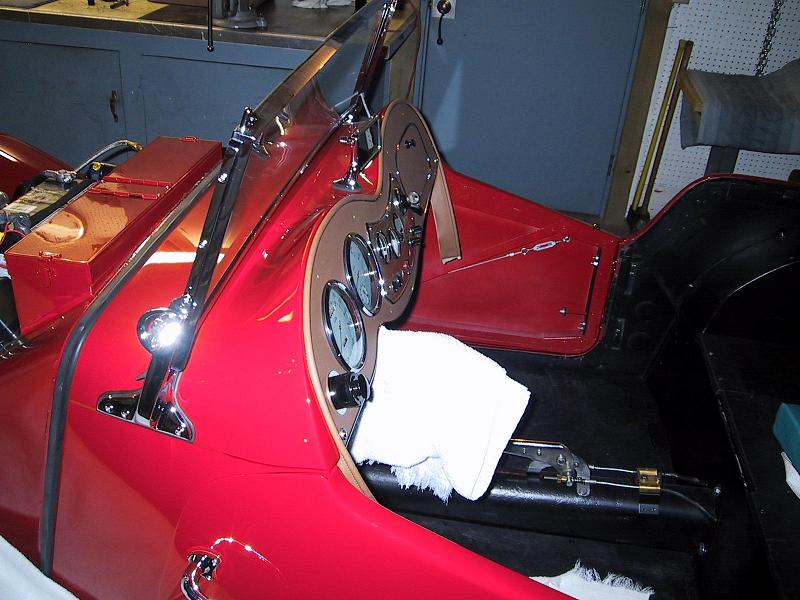
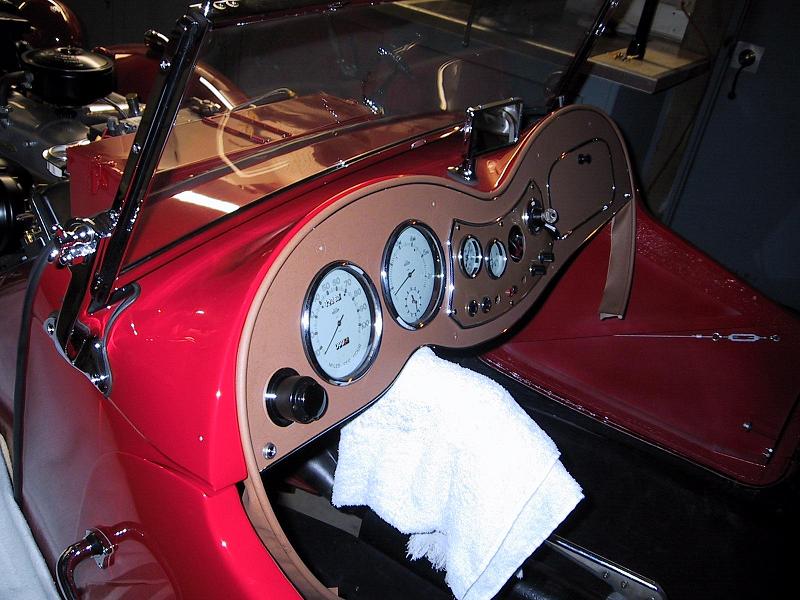
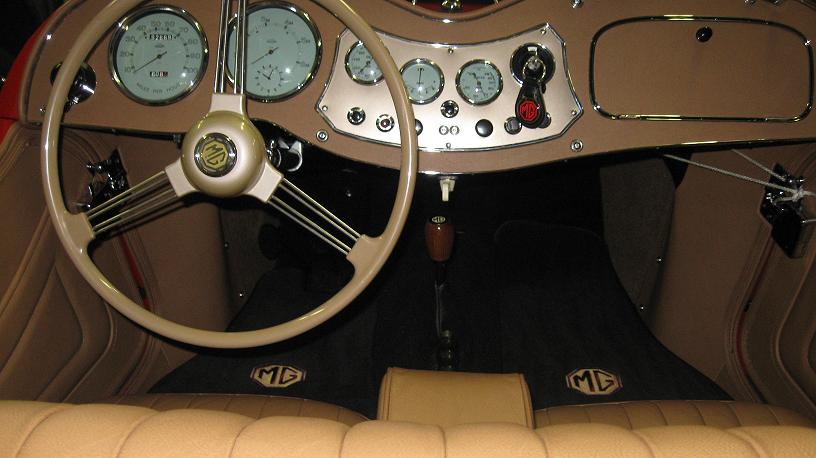
 January 23, 2011 Instrument
panel complete
January 23, 2011 Instrument
panel complete
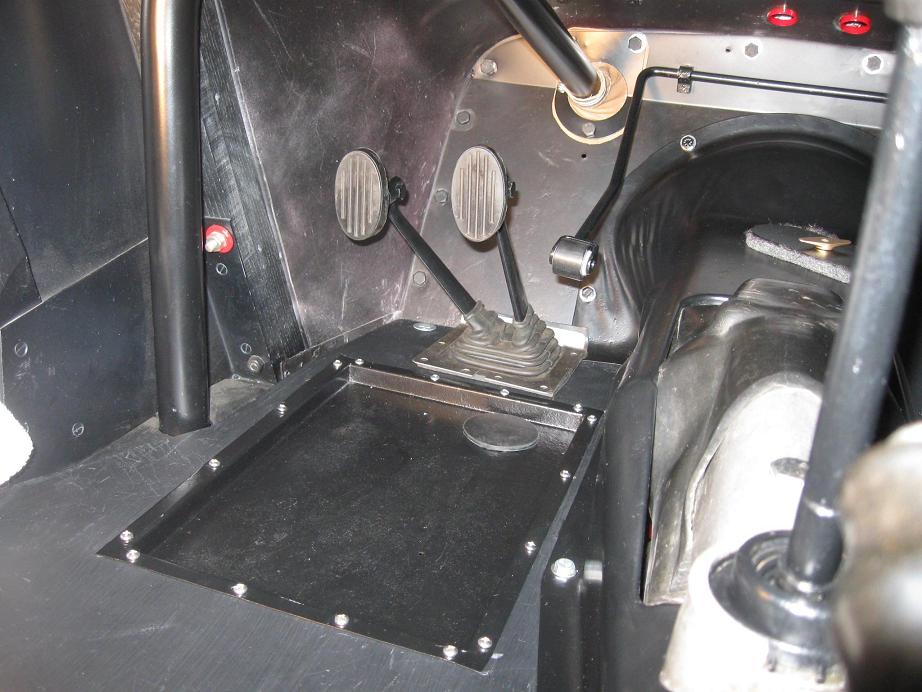
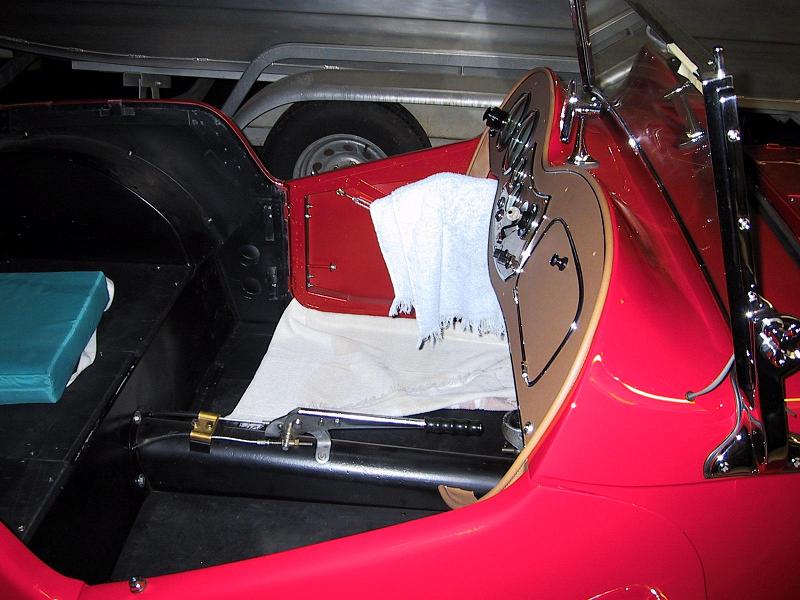
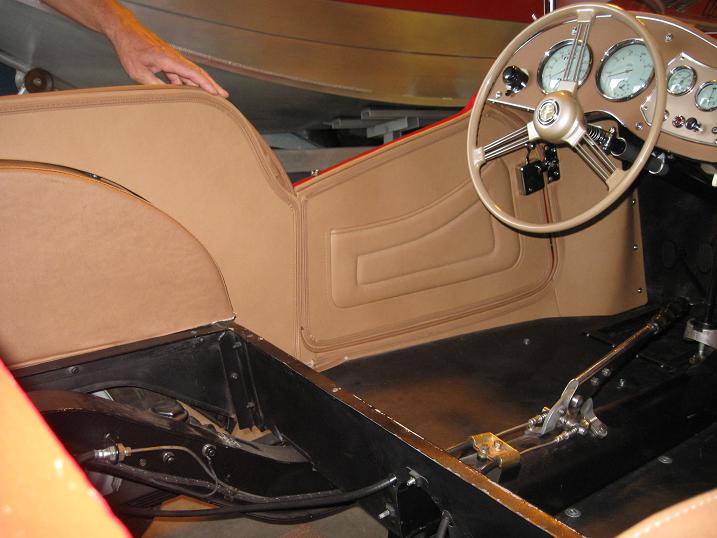
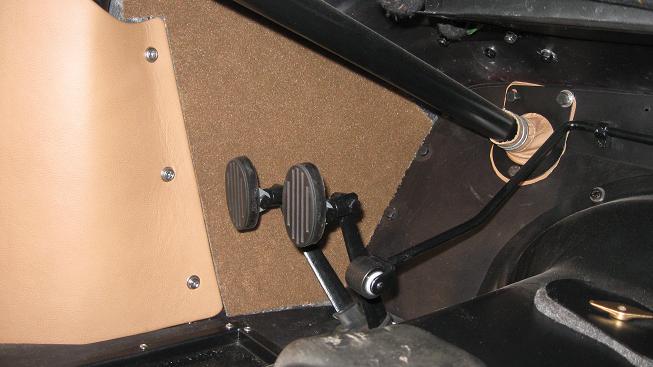
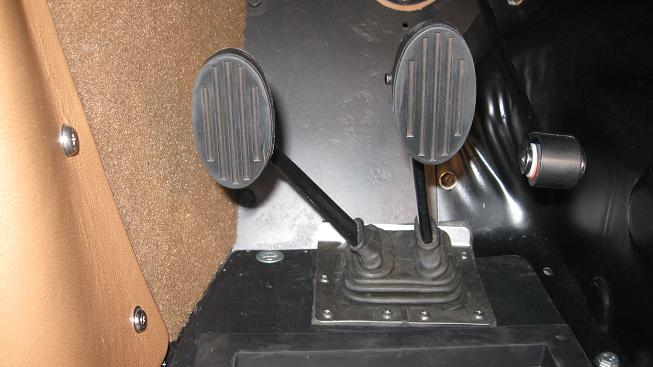
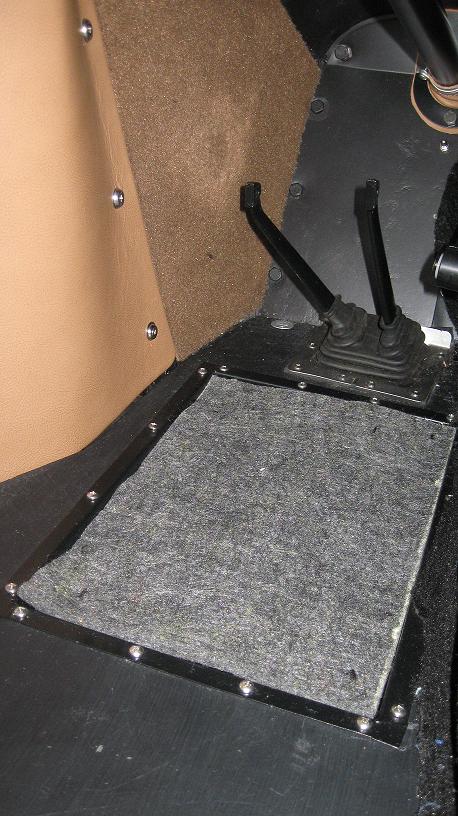
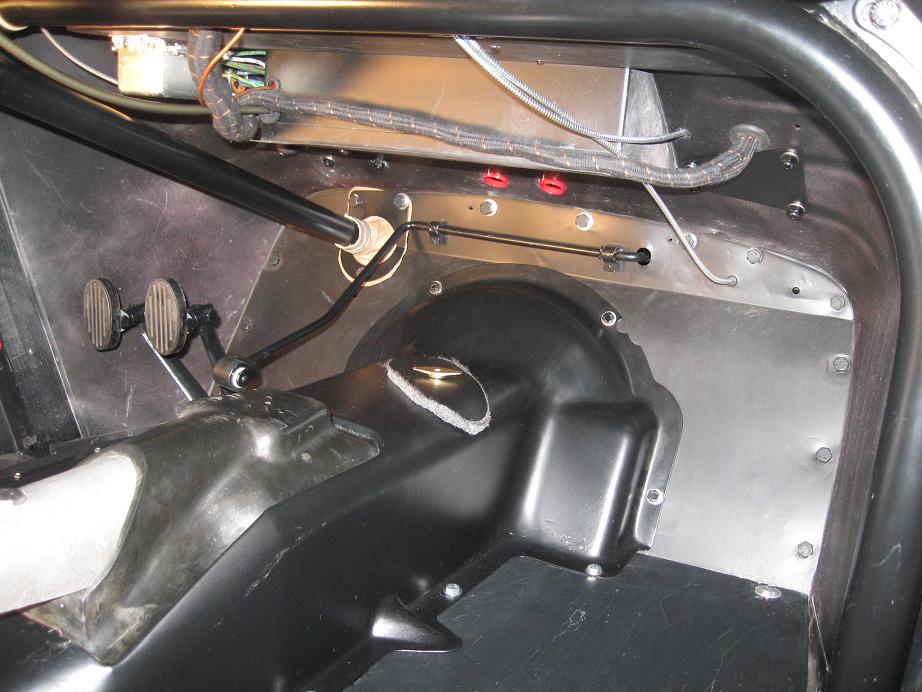 February 12, 2011 Floor
boards fastened, footwell plate installed,
February 12, 2011 Floor
boards fastened, footwell plate installed,
steering column fume excluder in place,
tranny housing bolted in, pedal rubber boot in place.
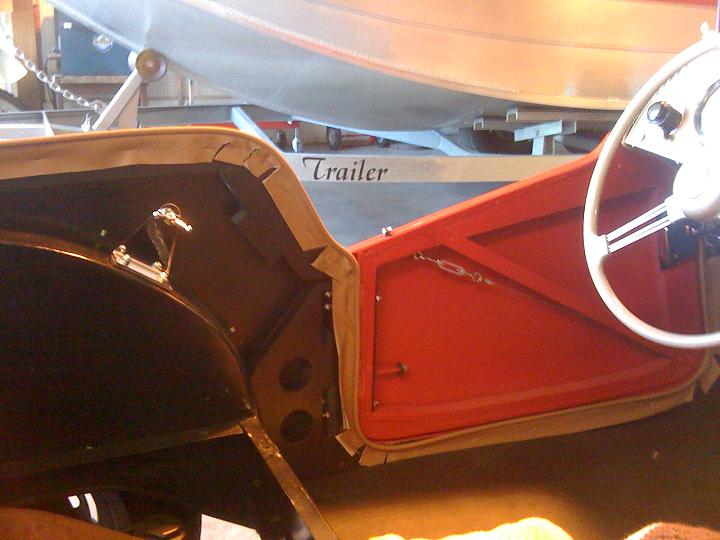
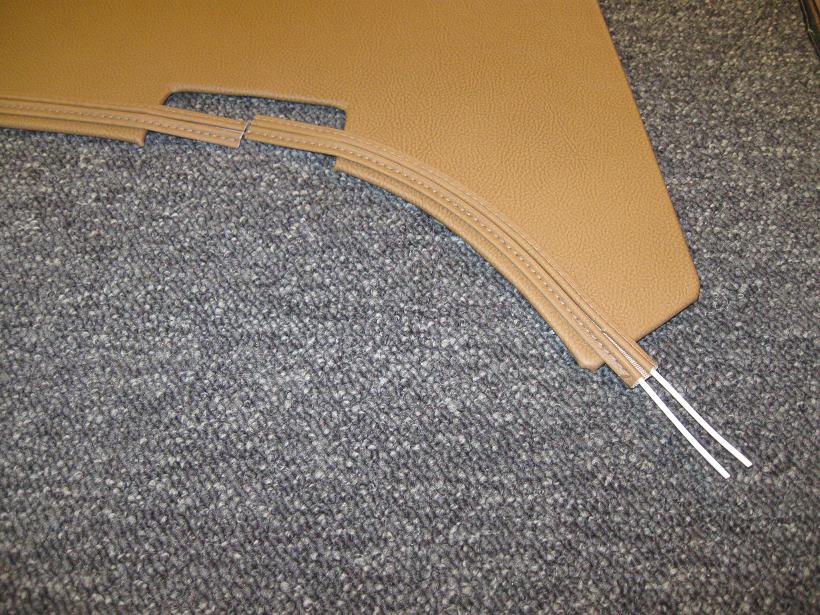
 July 28, 2011 Drivers
door piping installed, awaiting the front, door, and rear
panels.
July 28, 2011 Drivers
door piping installed, awaiting the front, door, and rear
panels.
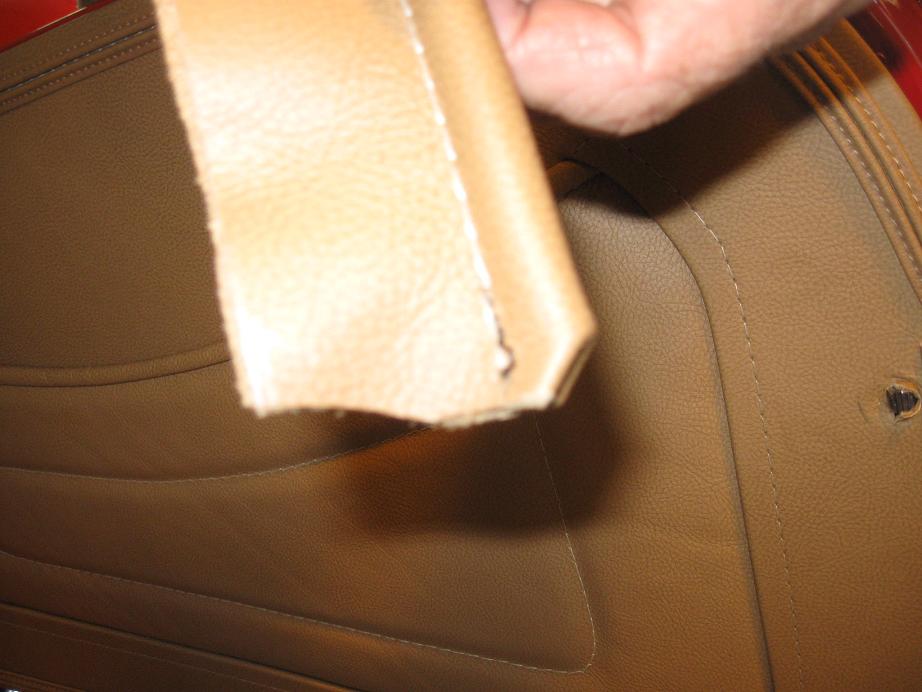
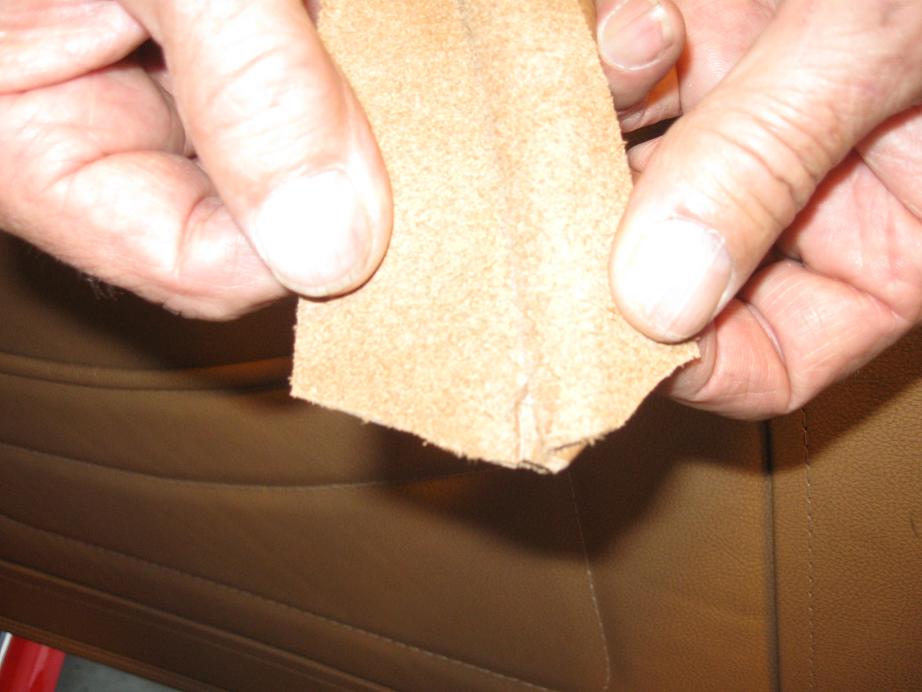
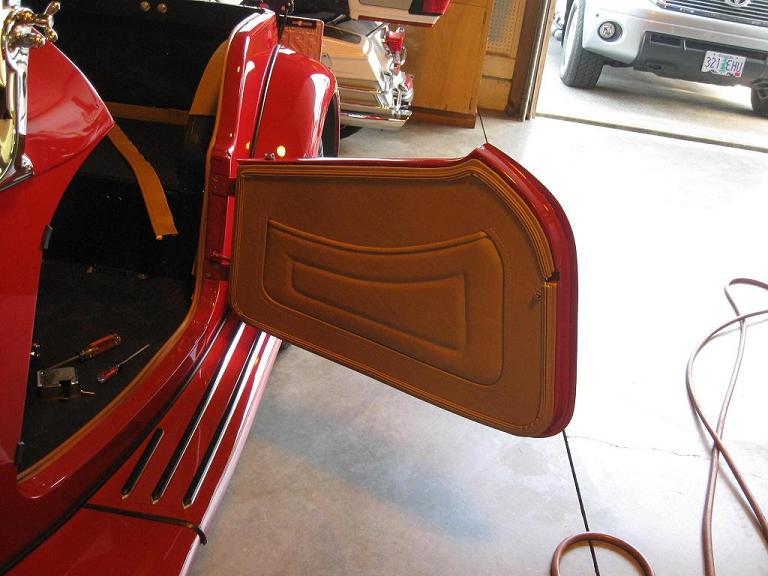

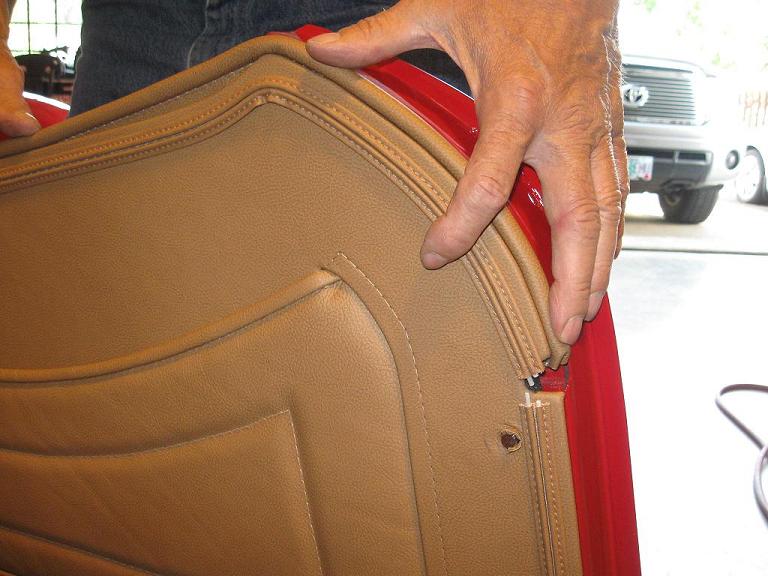
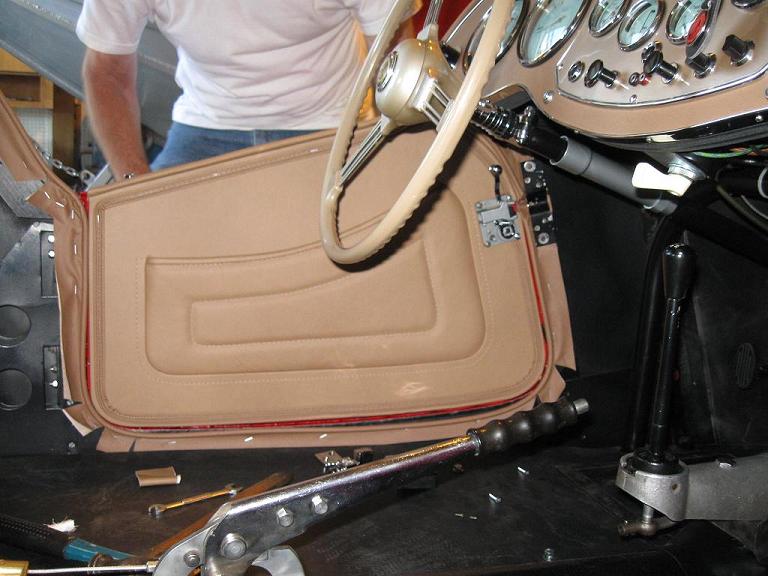
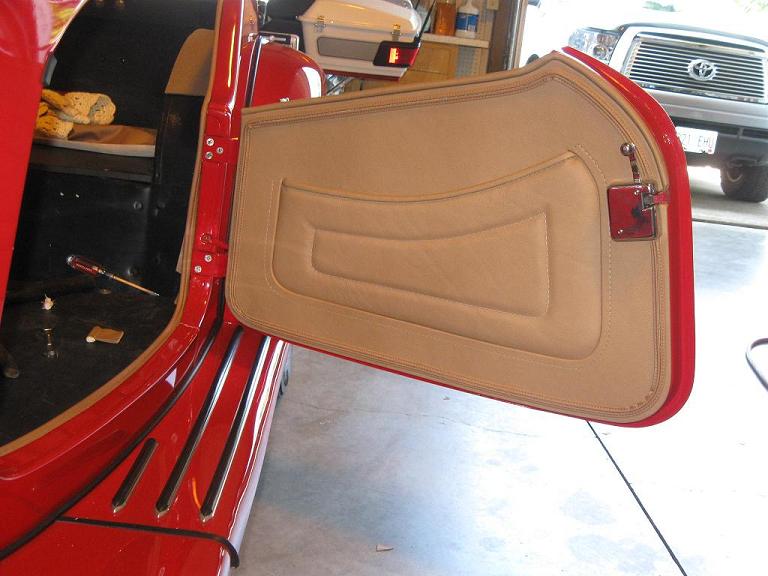
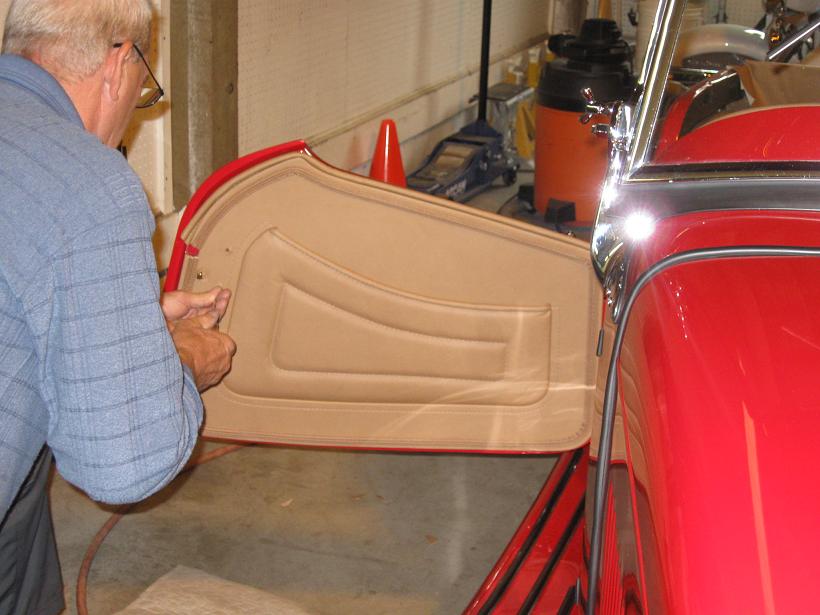
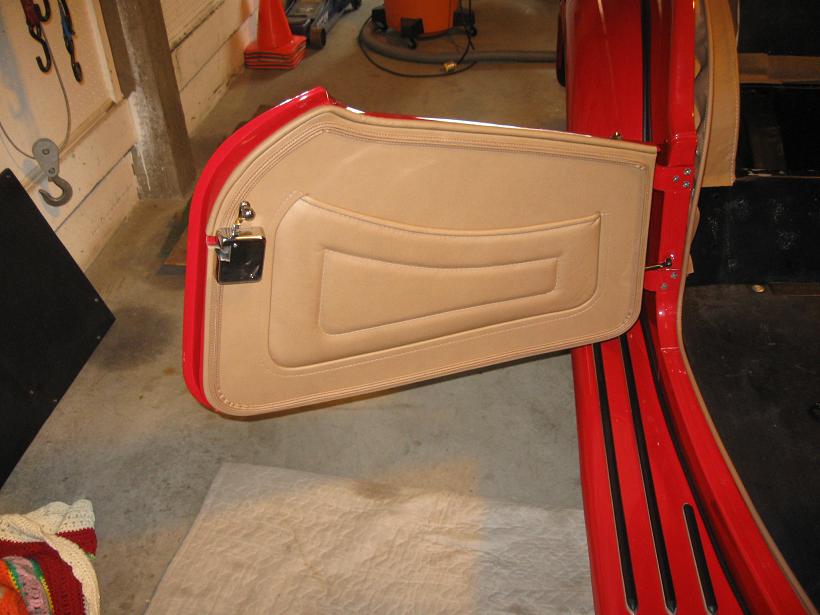
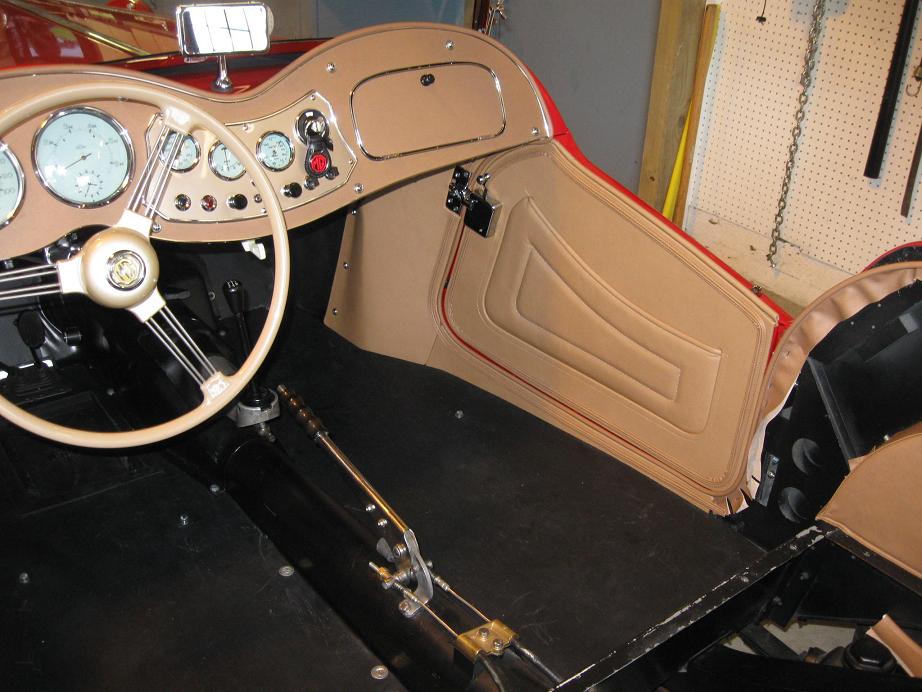
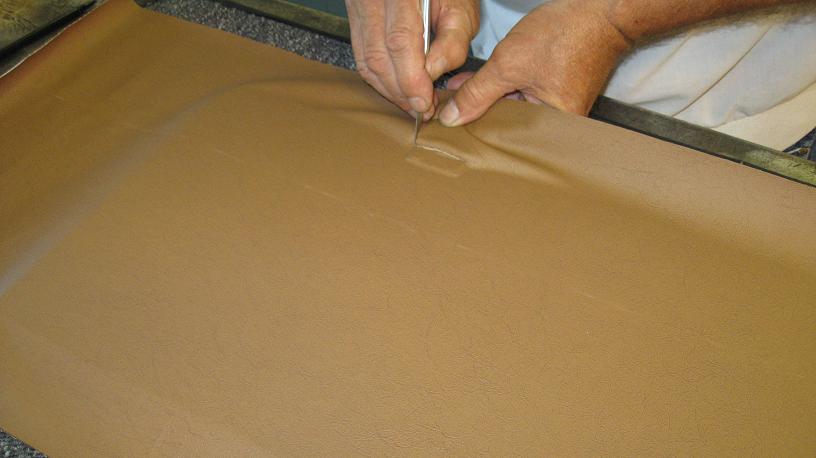
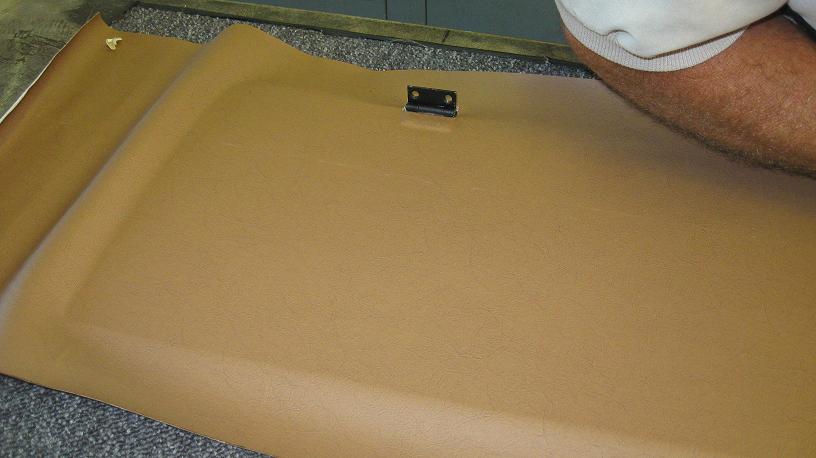
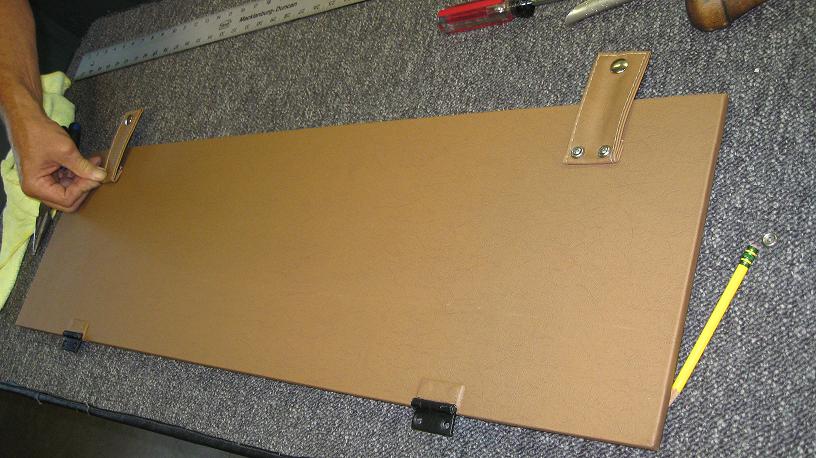
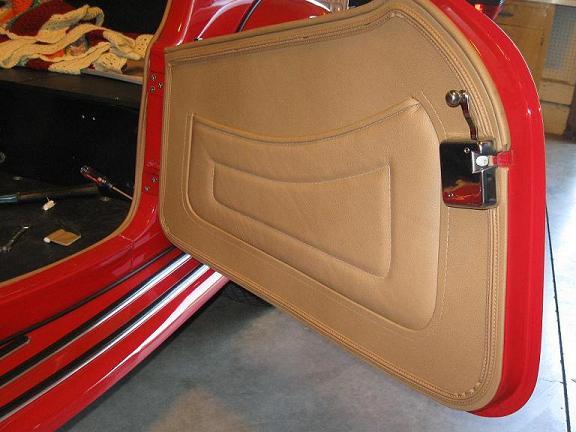 August 2, 2011 The driver's door panel being
installed. The top two pictures are taken after we
cut the stitching back from the piping, cut the piping
flush, folded the leather under and sewed it in
place. We then trimmed the leather back at
approximately a 45 degree angle, so once installed behind
the panel, it would be hidden. The last couple
pictures show the door latch installed, which is working
and latching properly. The same procedure will be
done on the passenger side.
August 2, 2011 The driver's door panel being
installed. The top two pictures are taken after we
cut the stitching back from the piping, cut the piping
flush, folded the leather under and sewed it in
place. We then trimmed the leather back at
approximately a 45 degree angle, so once installed behind
the panel, it would be hidden. The last couple
pictures show the door latch installed, which is working
and latching properly. The same procedure will be
done on the passenger side.
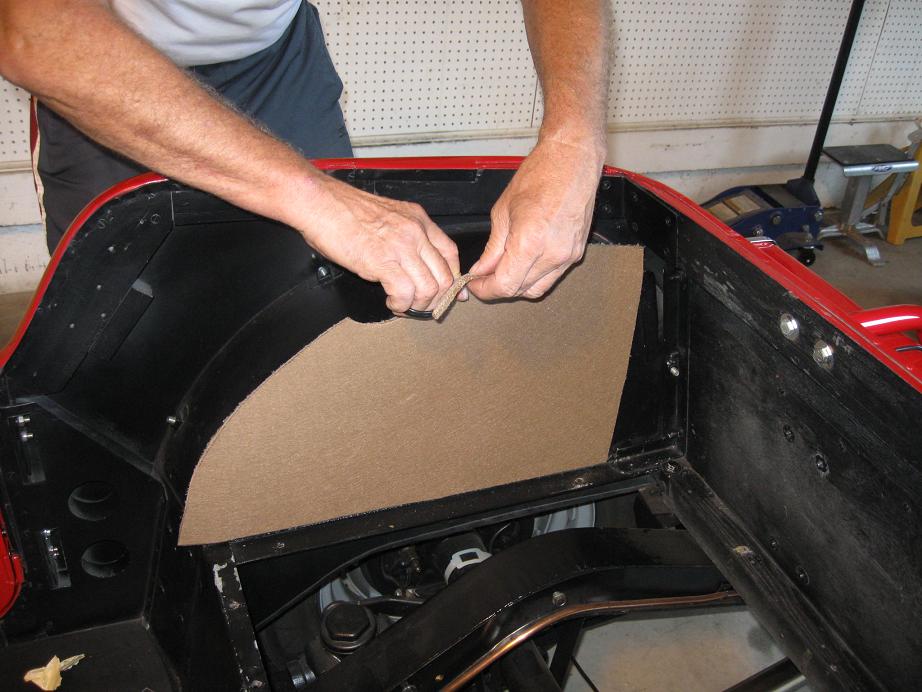
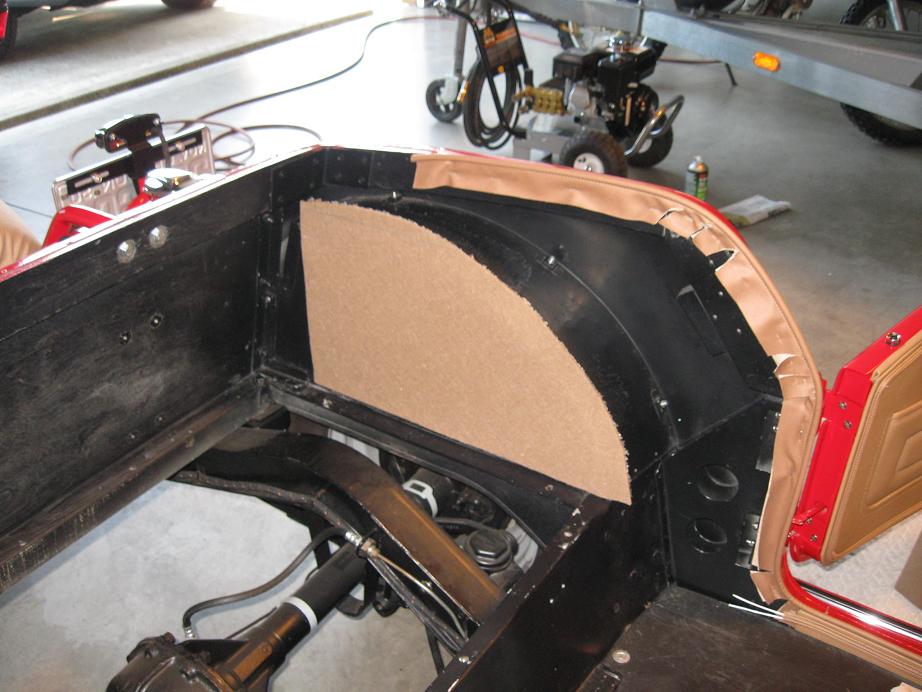
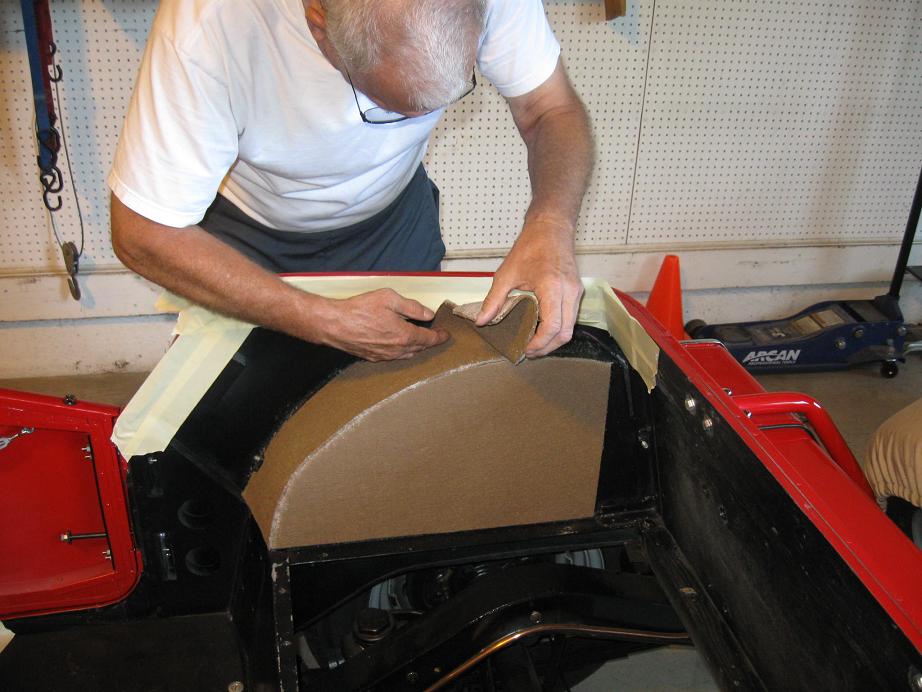
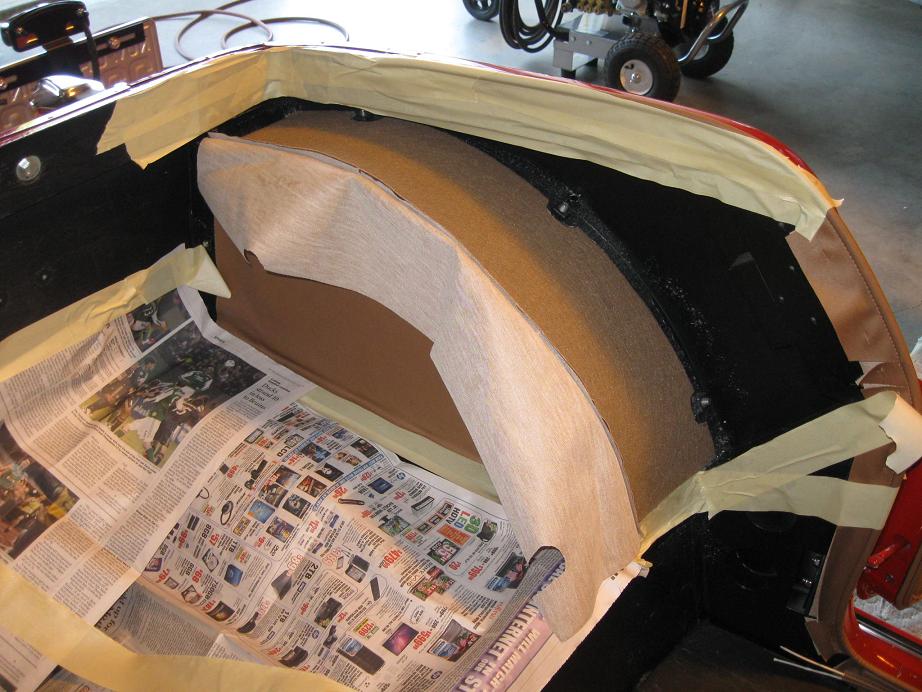
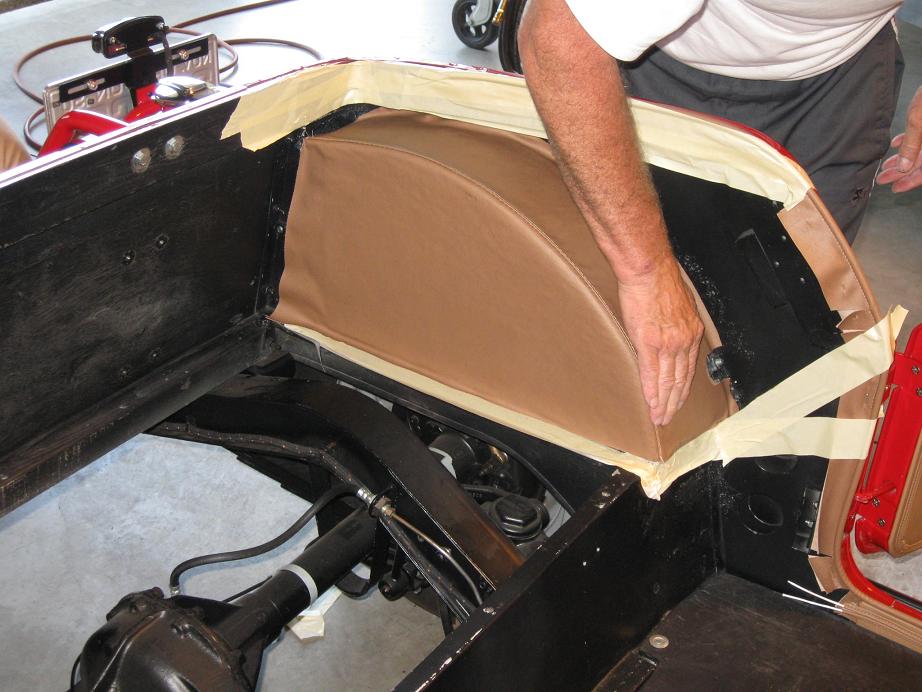
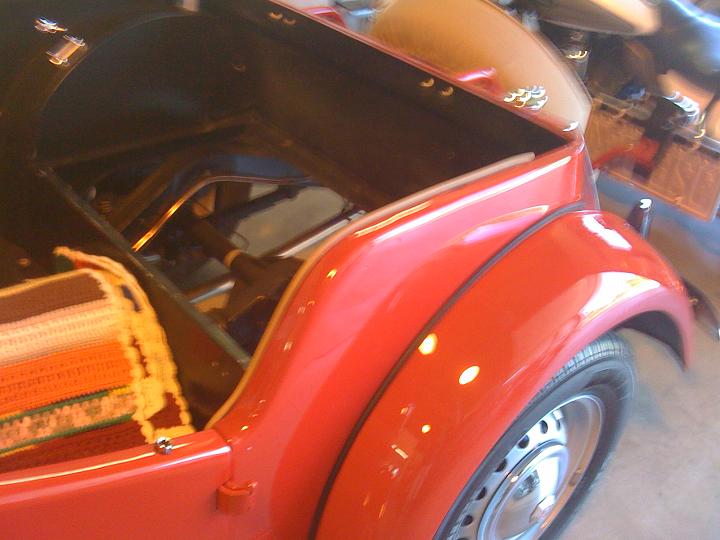
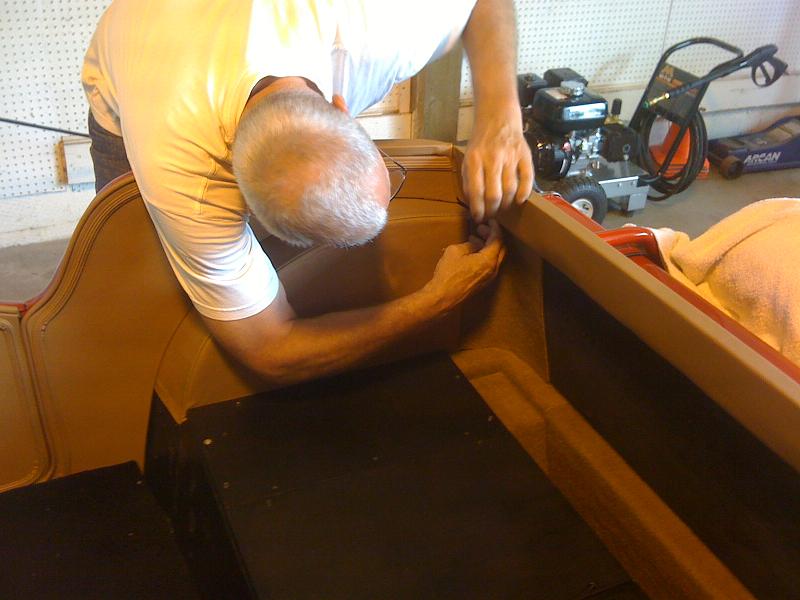
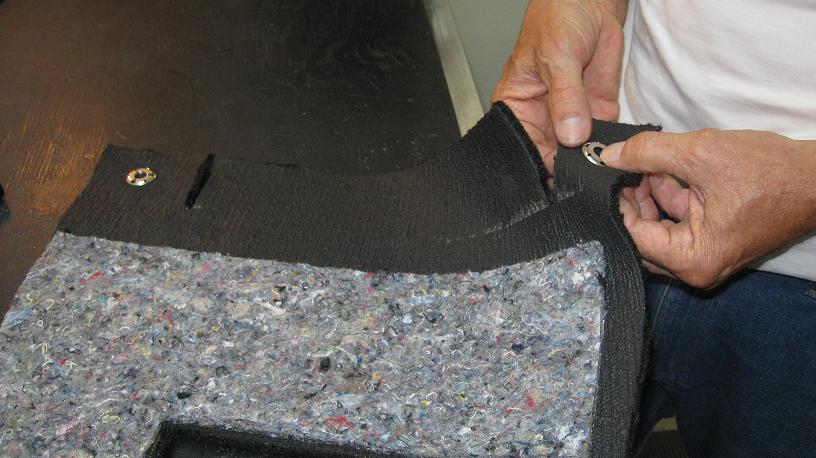
 August 3-4, 2011 Today we
moved to the back wheel wells. We used a marine grade
type carpeting as the under pad. The first couple
pictures show us installing the pad to the sides of each of
the wheel wells. We installed these pads oversized and
trimmed them to fit once they were installed to the
panel. Then, we created a top piece and used it as a
template for the opposite side of the car. Once the
pads were in place, it was time to install the vinyl
covers. This was quite the challenge. We decided
that we would spray glue on just the side portion of the
cover first and get the cover in place. Second, we
sprayed the top portion of the cover and laid it in place
and worked out any wrinkles that remained. This is not
as easy as it sounds, but the second cover did install much
easier than the first!
August 3-4, 2011 Today we
moved to the back wheel wells. We used a marine grade
type carpeting as the under pad. The first couple
pictures show us installing the pad to the sides of each of
the wheel wells. We installed these pads oversized and
trimmed them to fit once they were installed to the
panel. Then, we created a top piece and used it as a
template for the opposite side of the car. Once the
pads were in place, it was time to install the vinyl
covers. This was quite the challenge. We decided
that we would spray glue on just the side portion of the
cover first and get the cover in place. Second, we
sprayed the top portion of the cover and laid it in place
and worked out any wrinkles that remained. This is not
as easy as it sounds, but the second cover did install much
easier than the first!
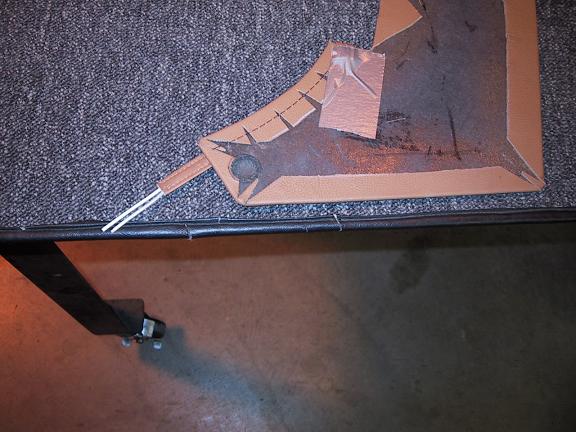
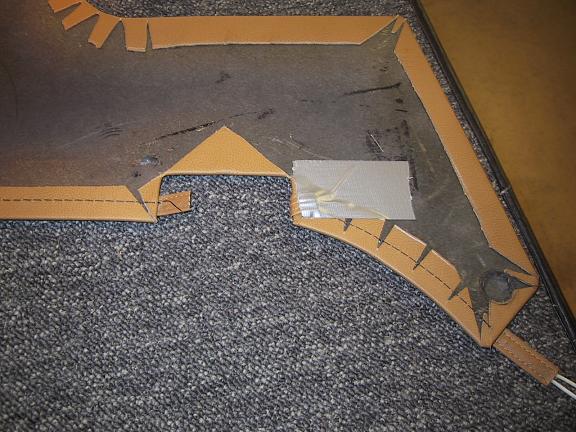
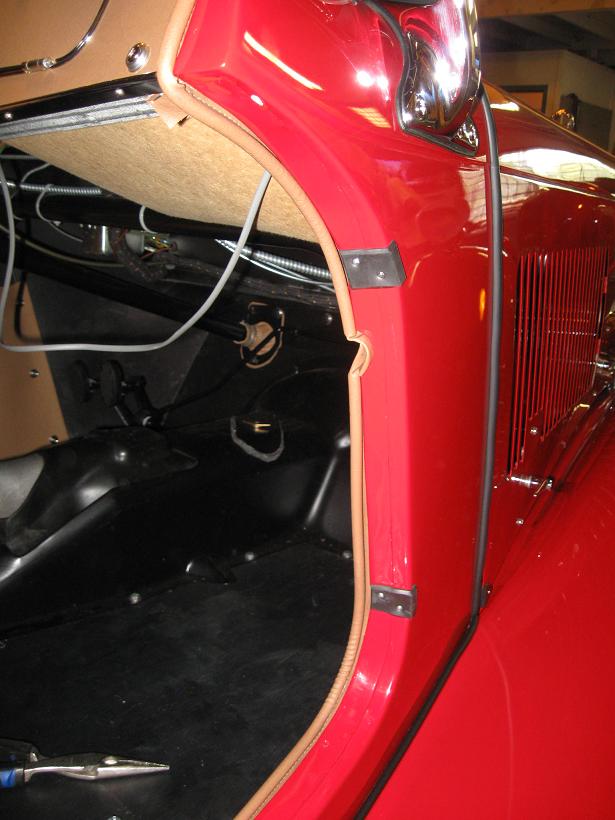
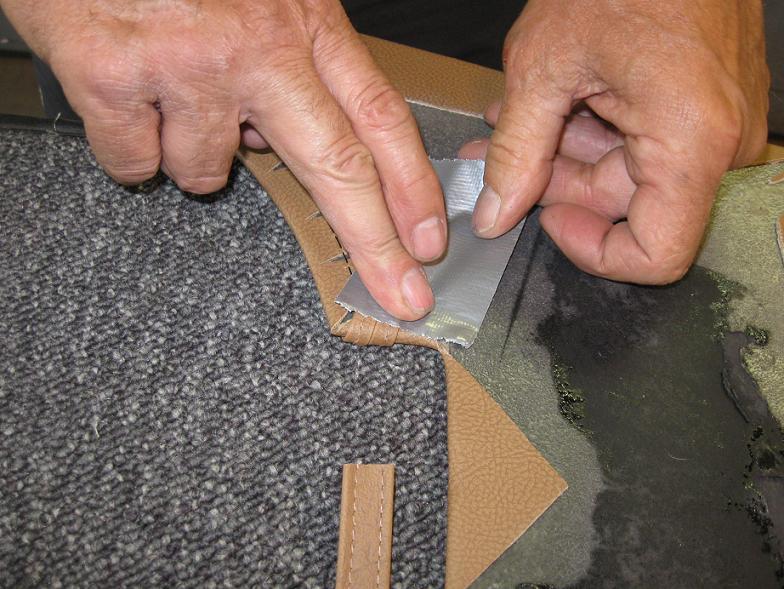
The last five pictures (moving left to right, top to bottom)
show some alterations to the front driver's side
panel. A small round area was carved from the
cardboard backing of the panel to allow a little extra space
for a protruding bolt. The "hide'em” at the door latch
area was cut back, piping removed and folded behind the
panel for a nice finished look. We used duct tape to
hold temporarily; the force of the panel being pushed
against the tub should hold everything in place without any
extra help from the tape. The last picture in the
bottom right shows all panels in place. The panel
above the rear wheel well is sitting in place for
show. Some trimming and other work needs to be
completed before we can permanently mount this panel.
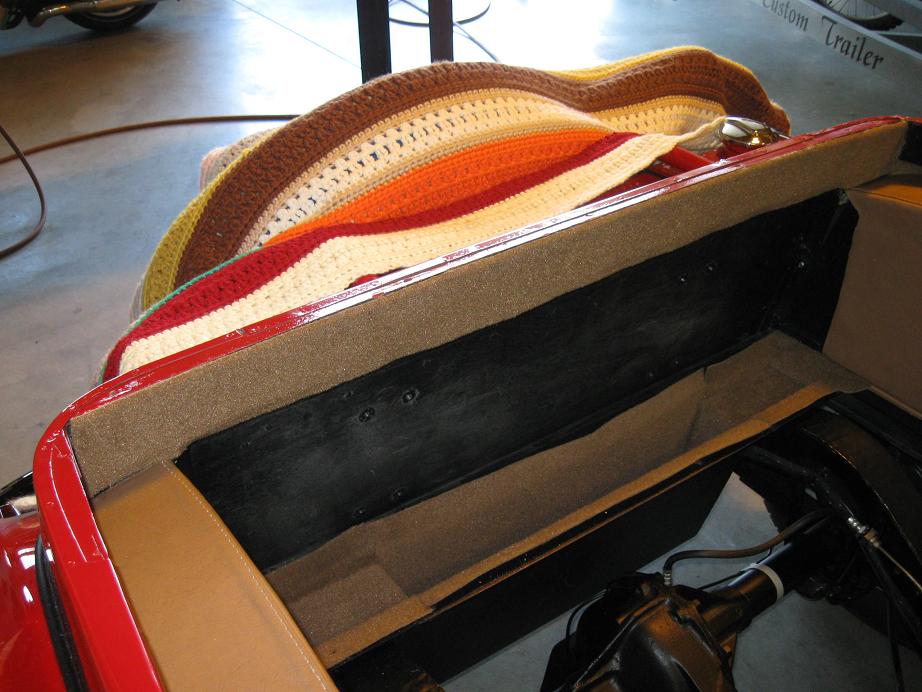
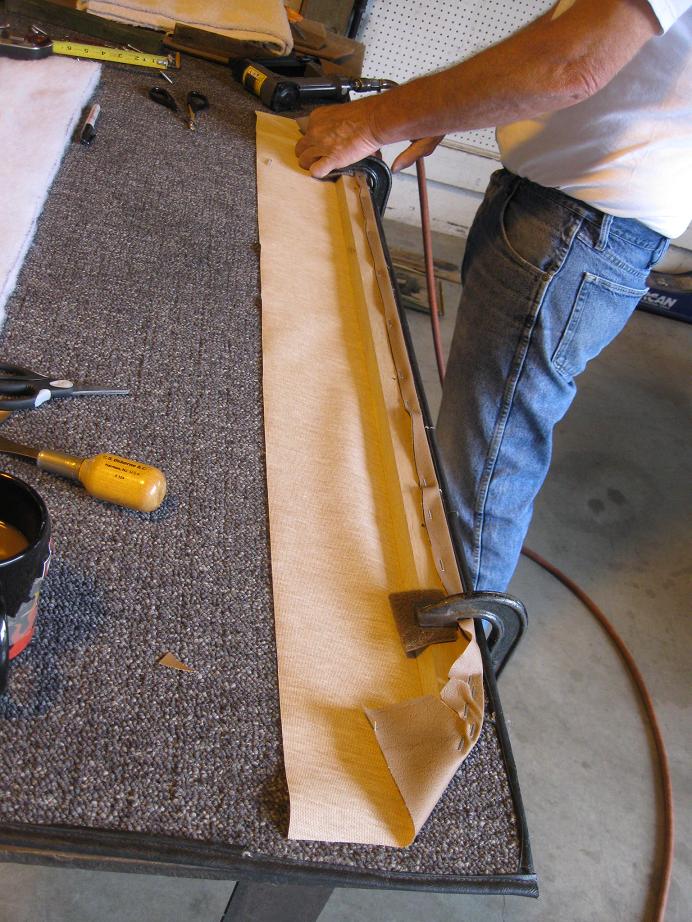
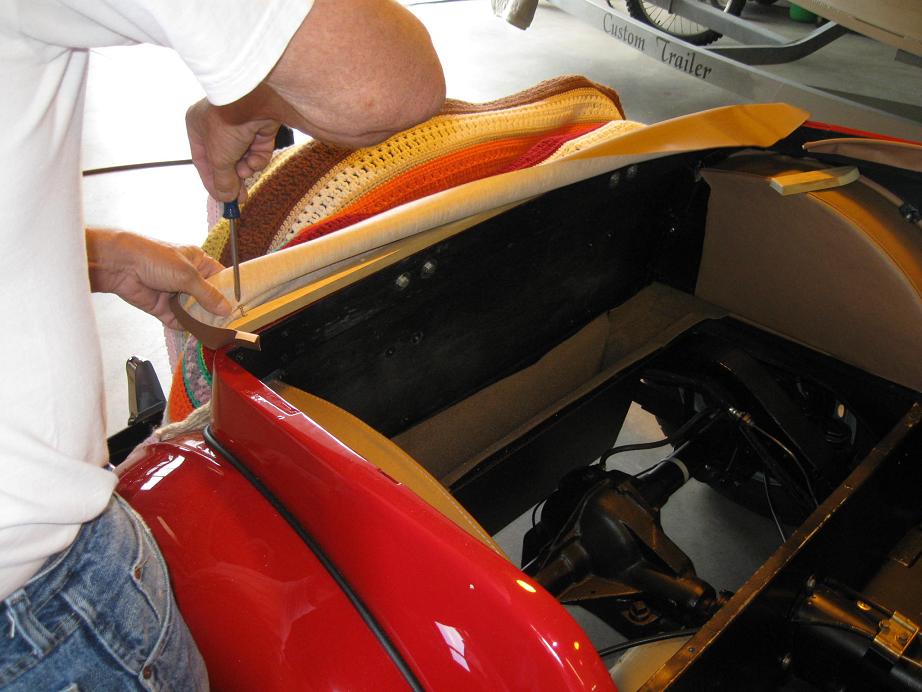
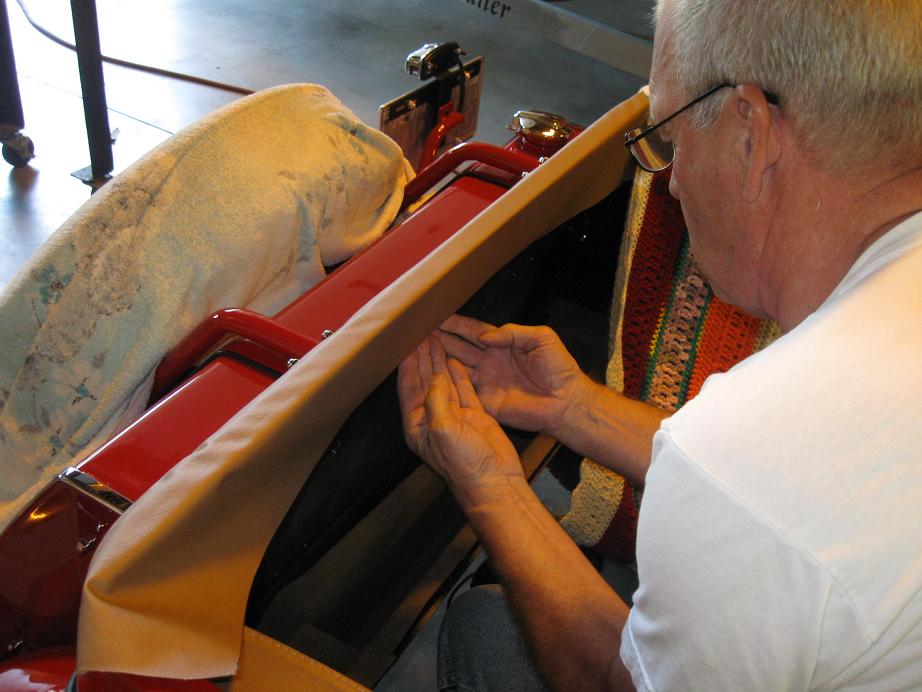
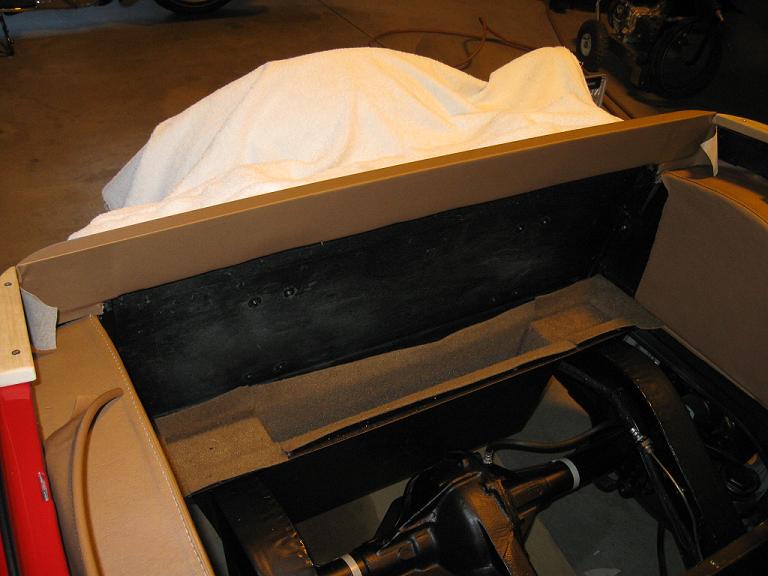
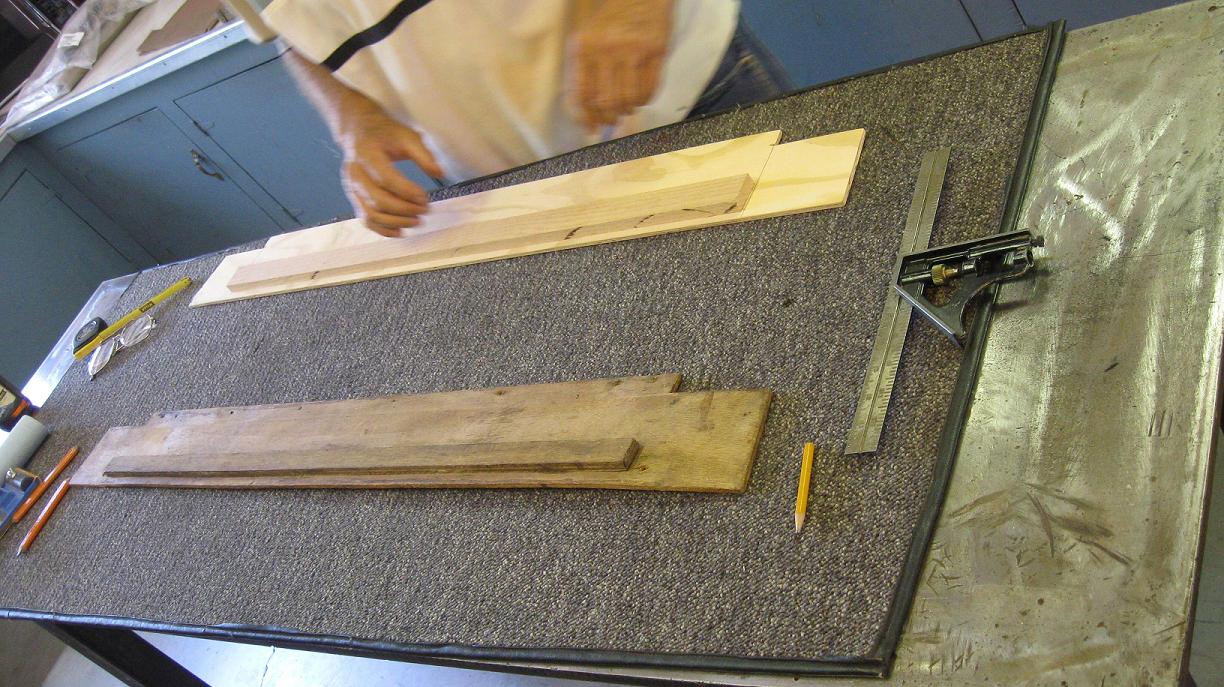
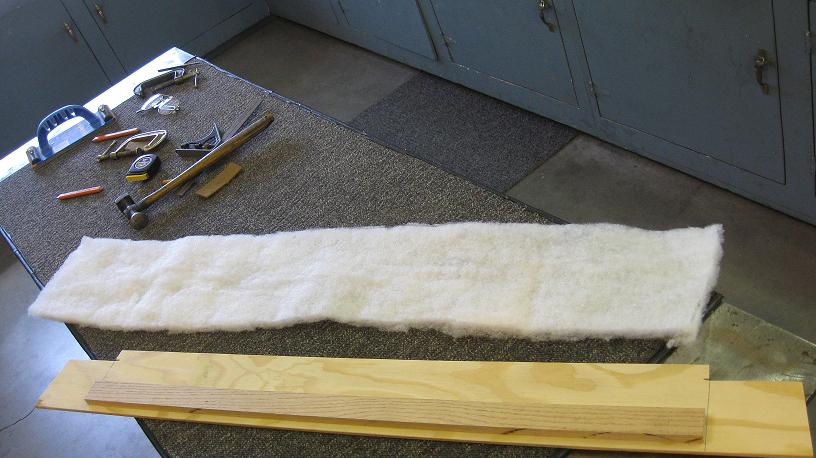
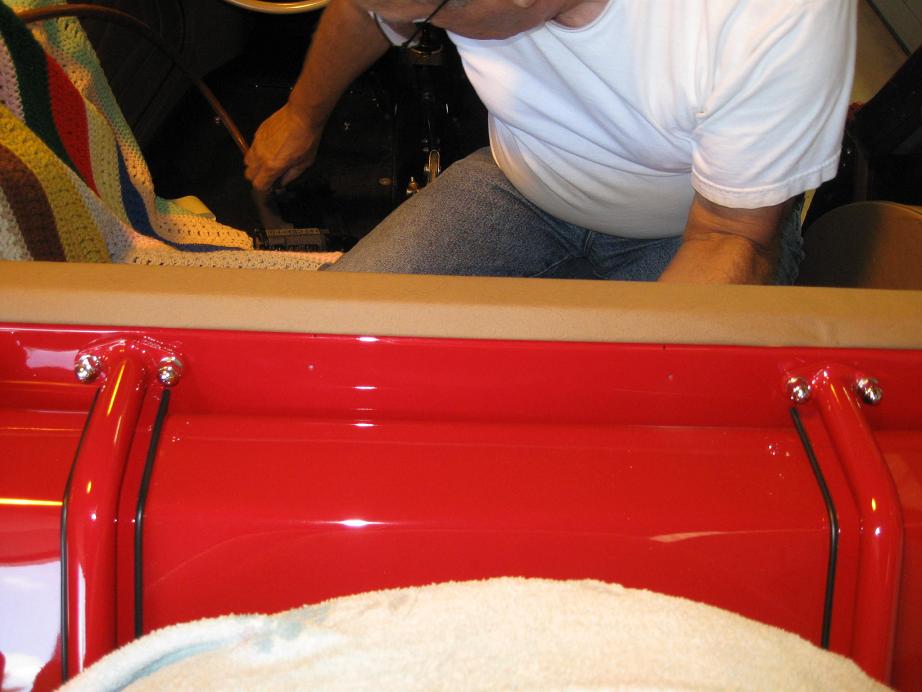 August 7, 2011 Today we
worked on covering the rear top rail. We started by
padding the back panel with marine grade carpeting.
The new top rail did not have the curvature the tub of the
car needed, so we started by screwing down the rail on one
end with one of the original good holes. We worked our
way along the back of the tub, creating new holes in the
middle, as the old holes were split apart. We slightly
bent the rail as we went and secured all the screws.
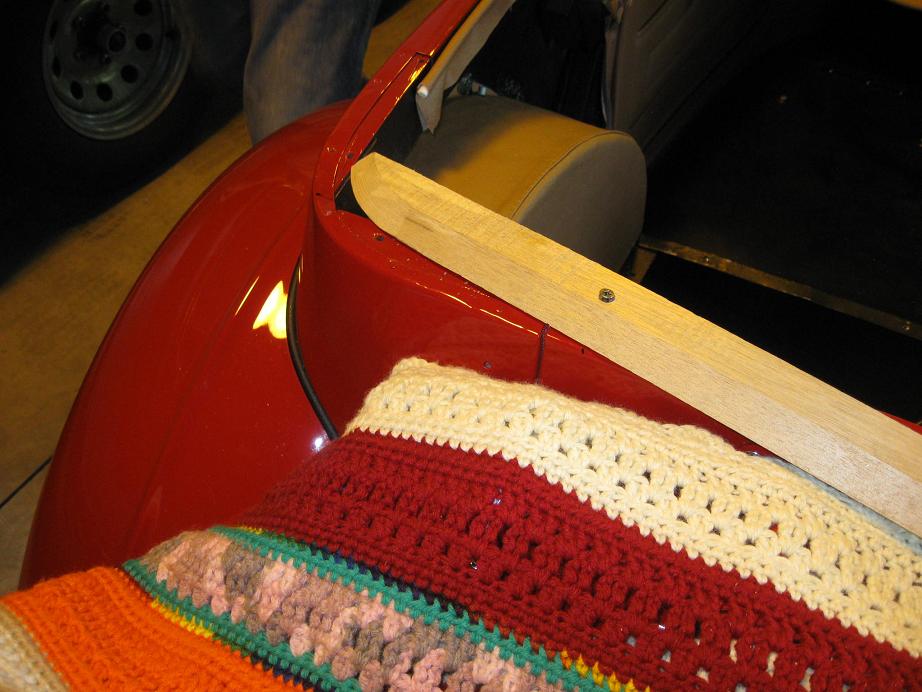
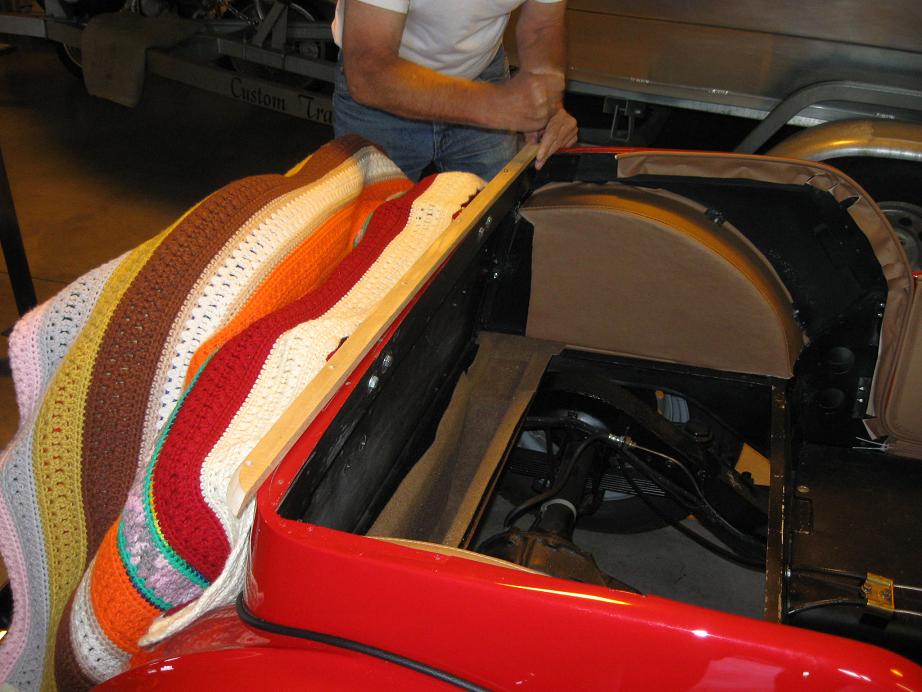
Once fitted to the tub, we removed the rail, slightly
modified the shape of the corners, and tacked the vinyl to
the rail, cutting the corners as needed. We stapled
the excess vinyl under the padded panel in the curtain
storage area. We still have some fine tuning to this
area before it is complete and we can install the top rail
side pieces.
August 7, 2011 Today we
worked on covering the rear top rail. We started by
padding the back panel with marine grade carpeting.
The new top rail did not have the curvature the tub of the
car needed, so we started by screwing down the rail on one
end with one of the original good holes. We worked our
way along the back of the tub, creating new holes in the
middle, as the old holes were split apart. We slightly
bent the rail as we went and secured all the screws.
Once fitted to the tub, we removed the rail, slightly
modified the shape of the corners, and tacked the vinyl to
the rail, cutting the corners as needed. We stapled
the excess vinyl under the padded panel in the curtain
storage area. We still have some fine tuning to this
area before it is complete and we can install the top rail
side pieces.
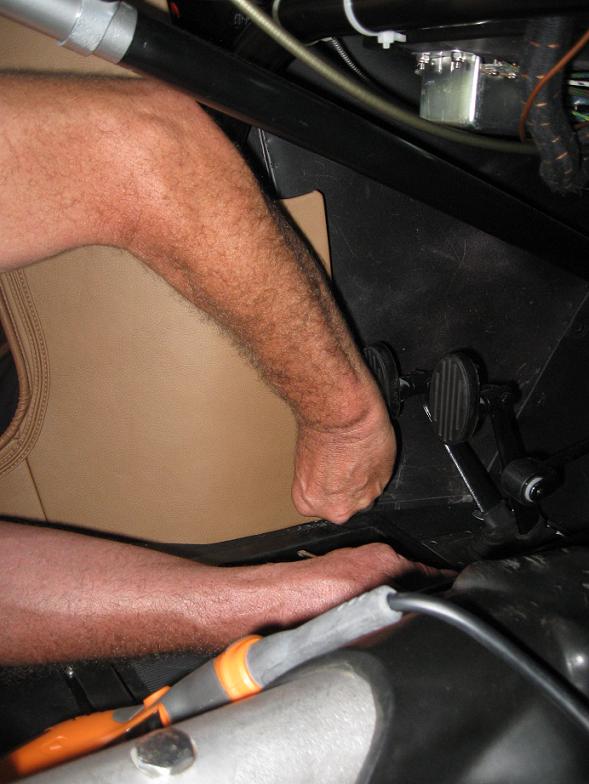
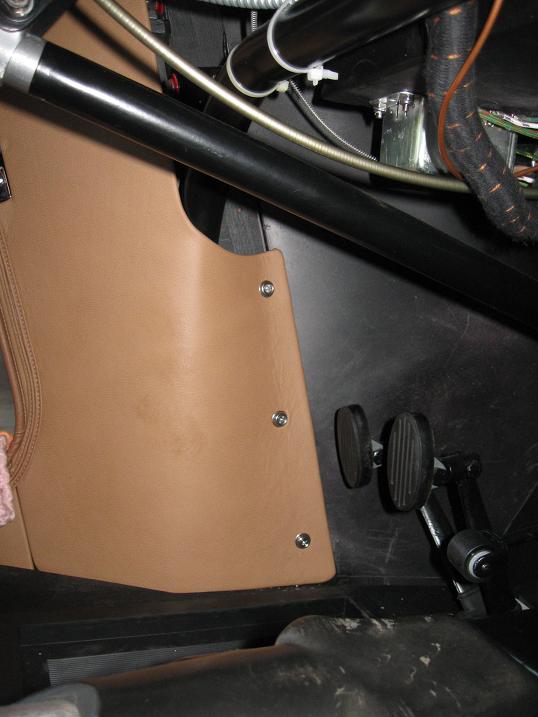
 August 9, 2011 Today we
worked on the passenger door panel and front panel. We
learned a lot from the driver’s side, so our work was much
less difficult and efficient! The door panel, latch,
side piping installed, with the door now latching
properly. Pictures above show how we split the
"hide'em" in the front panel, pulled the piping out and
again folded it to the back of the panel using duct tape to
hold it in place during install. Again, we had to
remove some of the backing to allow space for a protruding
bolt on the upper portion of the panel.
August 9, 2011 Today we
worked on the passenger door panel and front panel. We
learned a lot from the driver’s side, so our work was much
less difficult and efficient! The door panel, latch,
side piping installed, with the door now latching
properly. Pictures above show how we split the
"hide'em" in the front panel, pulled the piping out and
again folded it to the back of the panel using duct tape to
hold it in place during install. Again, we had to
remove some of the backing to allow space for a protruding
bolt on the upper portion of the panel.
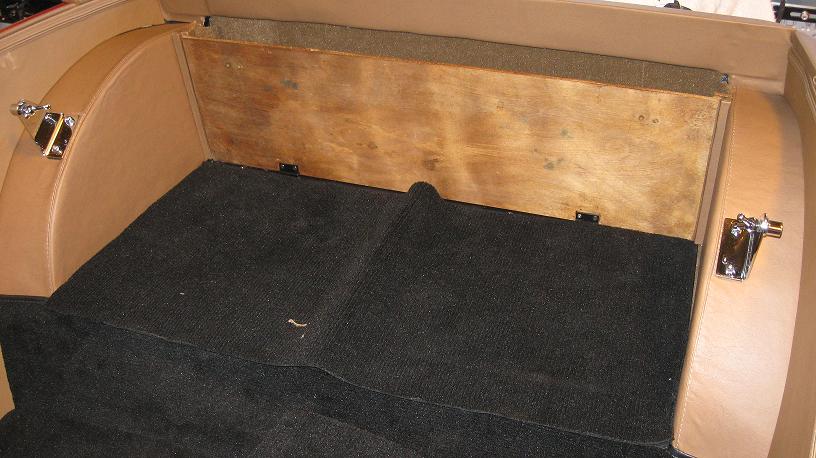
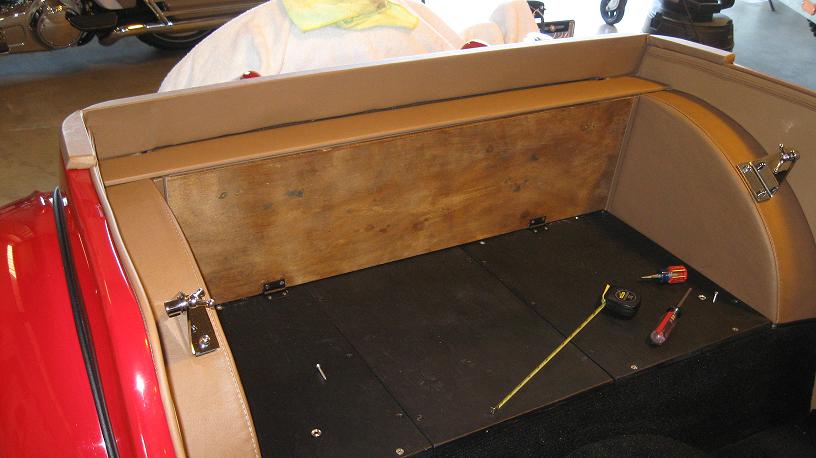
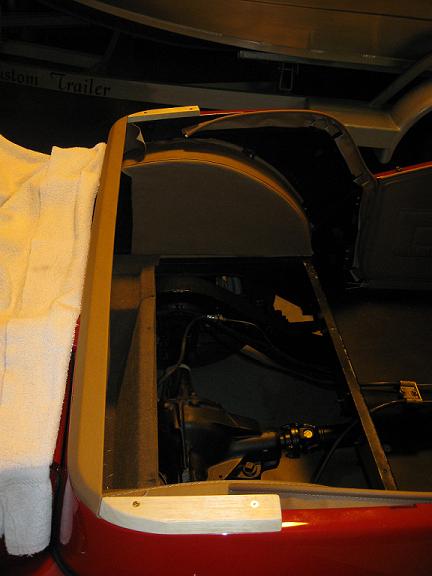 August 12, 2011 More work
on the top rail set. The rear board is in place and
covered. The side pieces are trimmed and fit in place,
ready to be covered.
August 12, 2011 More work
on the top rail set. The rear board is in place and
covered. The side pieces are trimmed and fit in place,
ready to be covered.
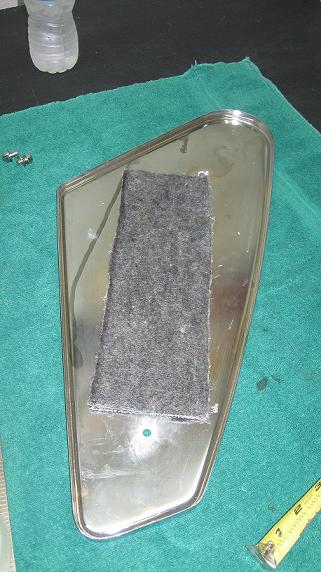
 August 13, 2011 The
finisher set for the sidescreen box are cleaned up and
painted along with the securing bolts and the
sidescreen hinges.
August 13, 2011 The
finisher set for the sidescreen box are cleaned up and
painted along with the securing bolts and the
sidescreen hinges.


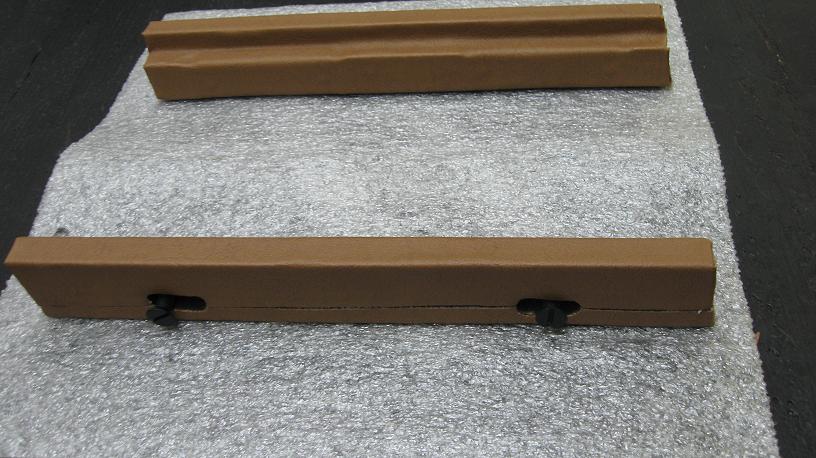 August 14, 2011 The
finisher set is covered with vinyl.
August 14, 2011 The
finisher set is covered with vinyl.
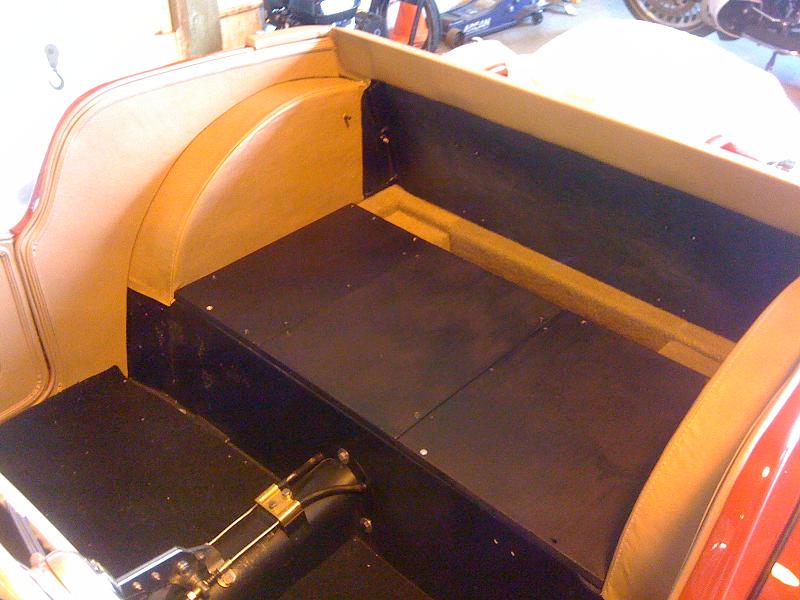
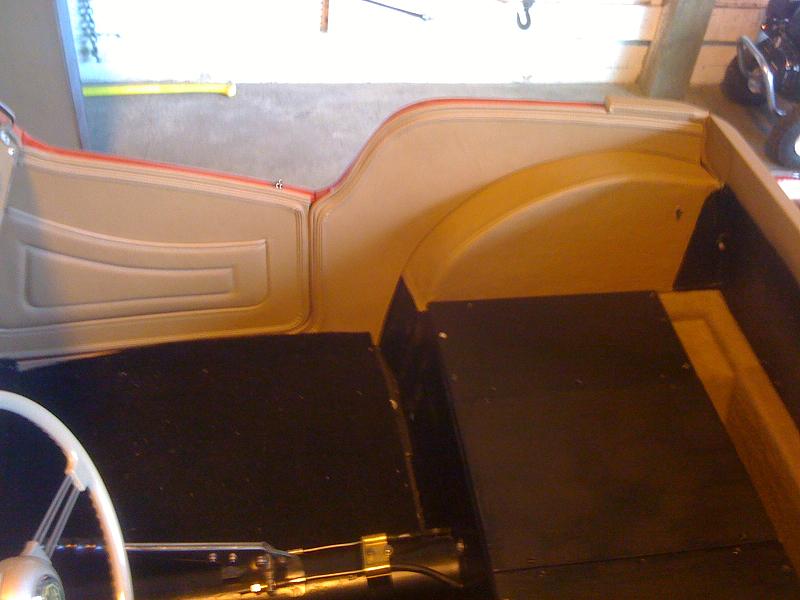
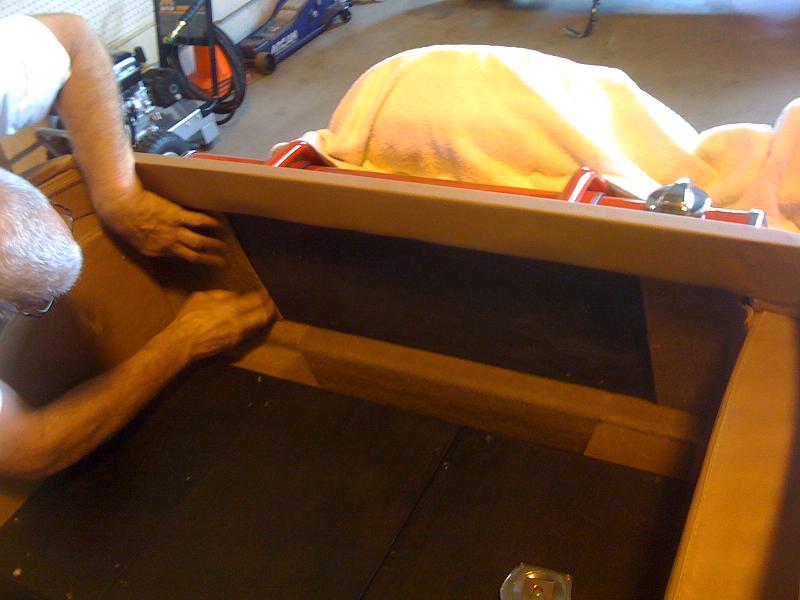
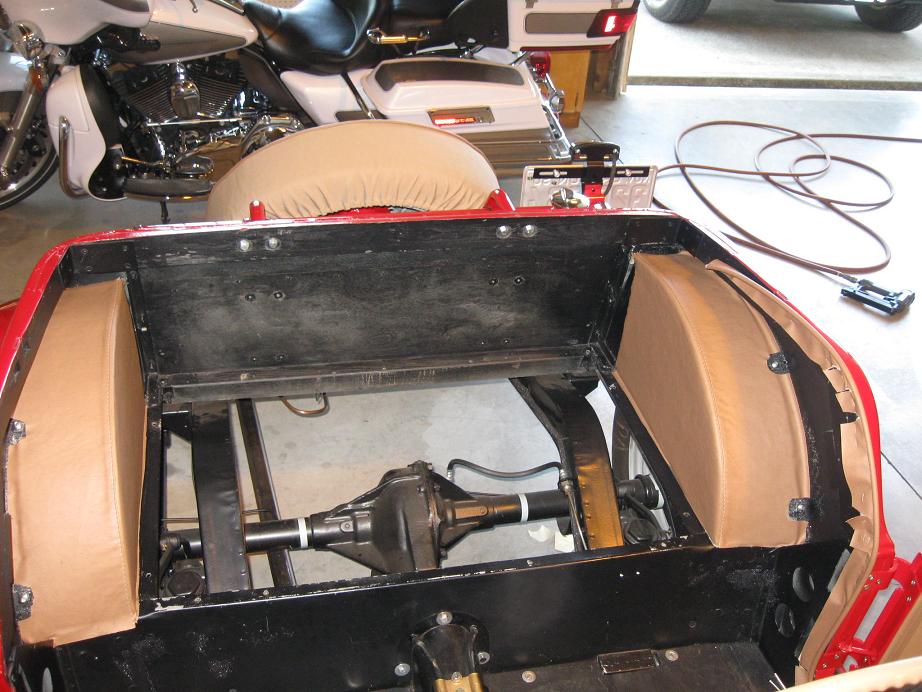
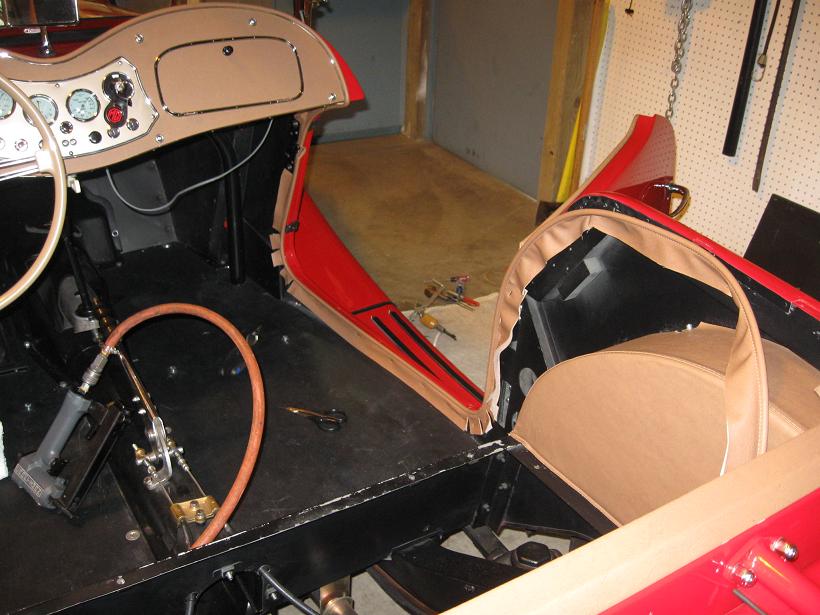
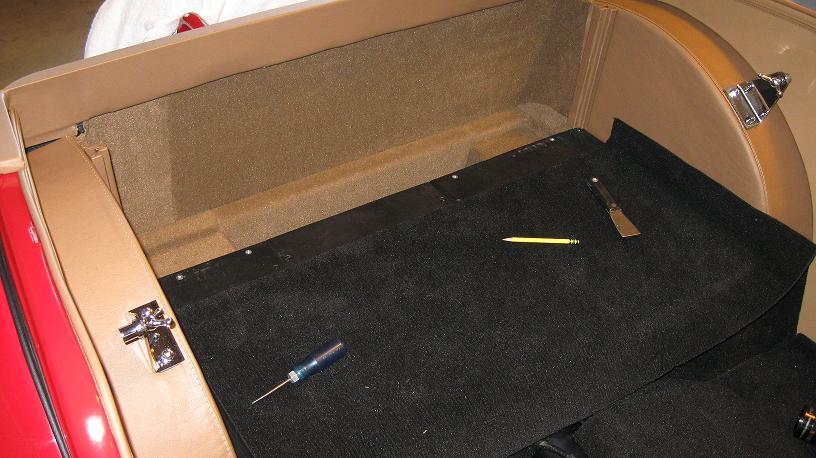
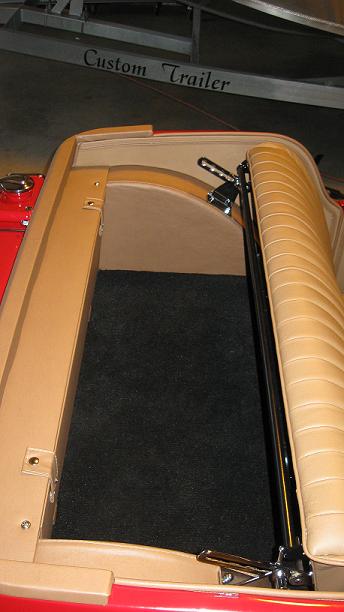
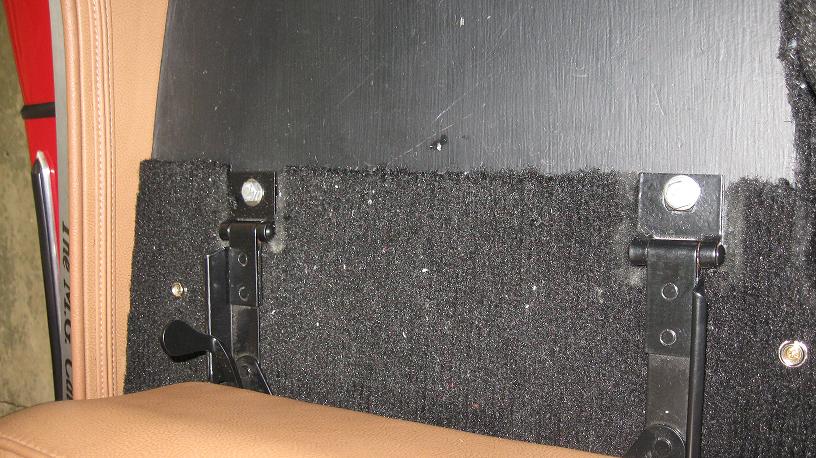
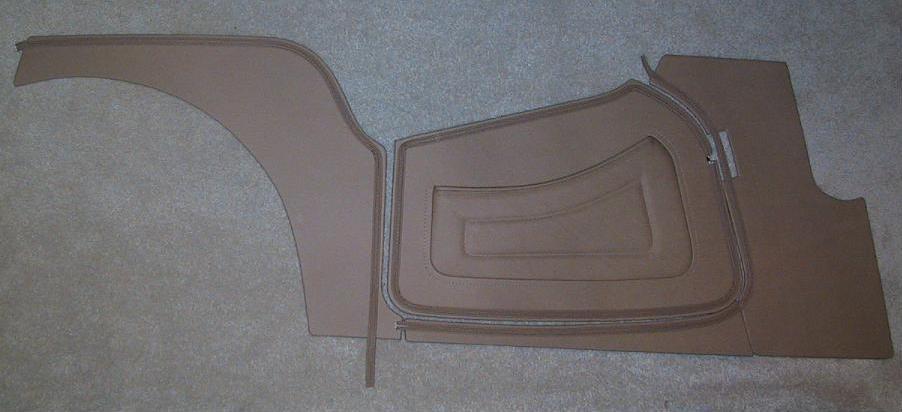
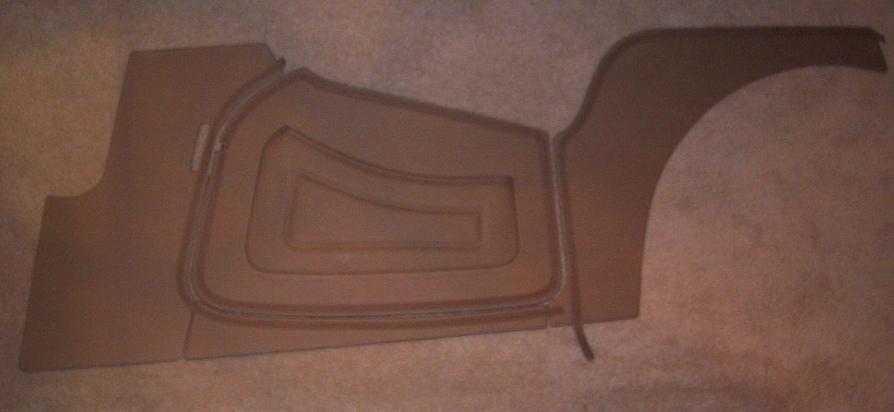
 August 23, 2011 The side
pieces on the top rail set have been completed. The
rear side panels are now in place. We used a marine
grade carpet to finish off the sidescreen box. Part of
the carpet kit has been installed to allow the panel
assembly above the rear axle to be put in place.
August 23, 2011 The side
pieces on the top rail set have been completed. The
rear side panels are now in place. We used a marine
grade carpet to finish off the sidescreen box. Part of
the carpet kit has been installed to allow the panel
assembly above the rear axle to be put in place.
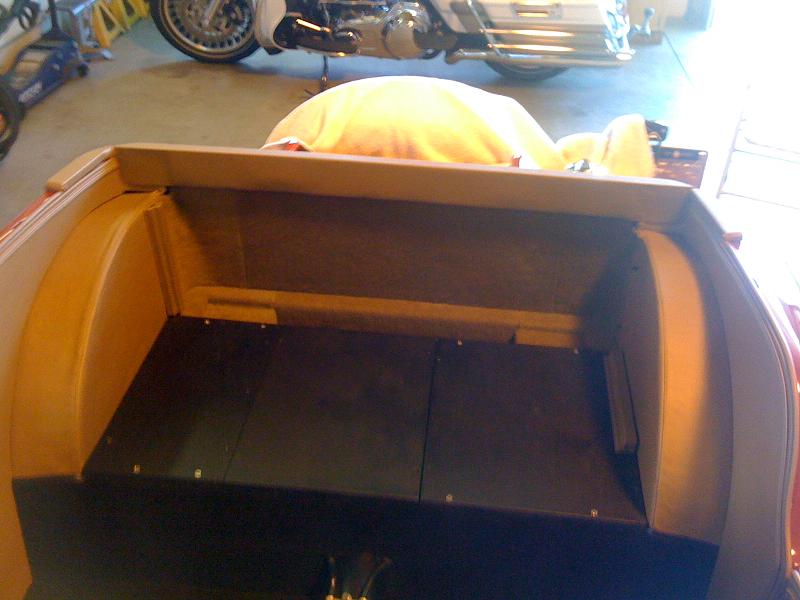
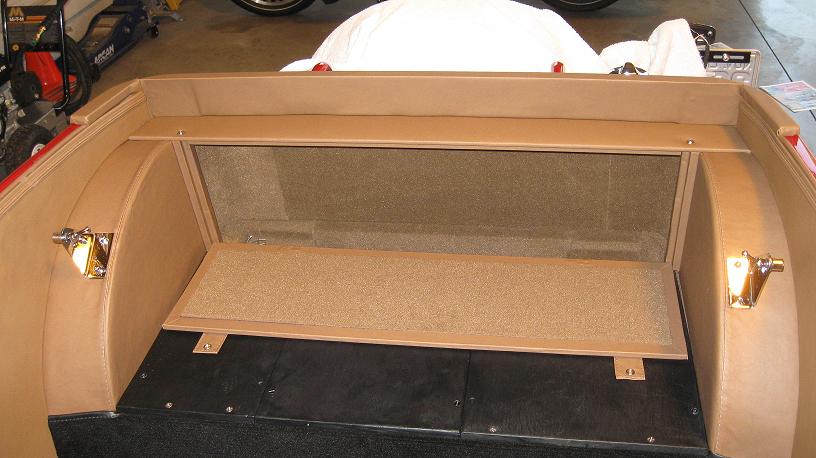
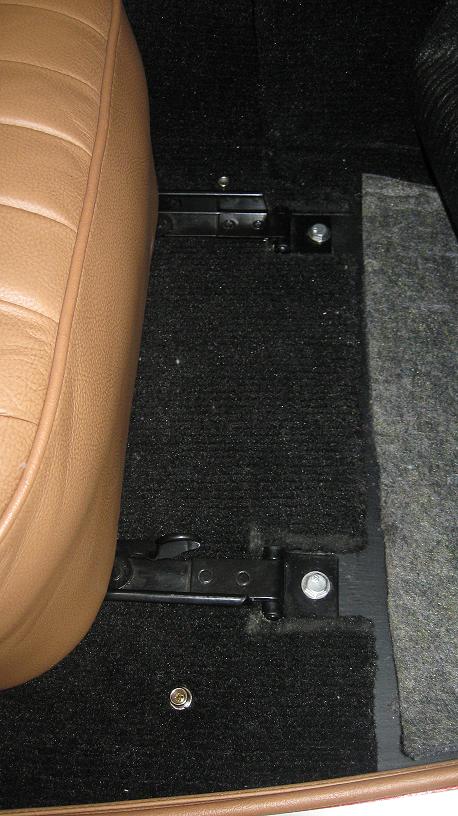
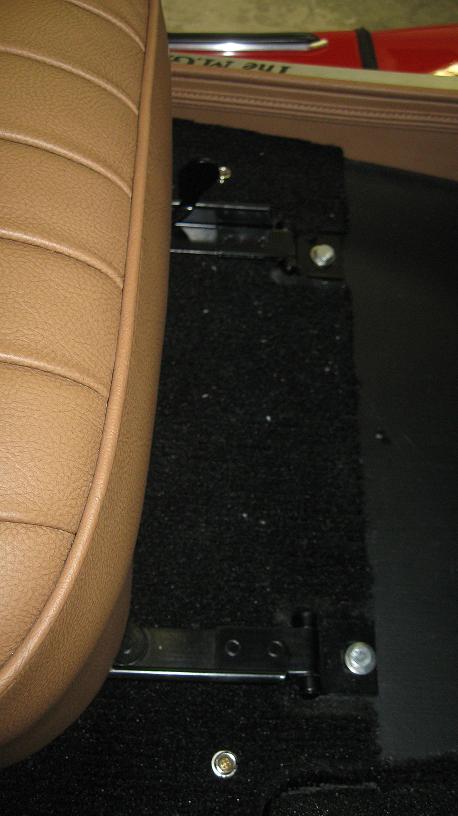
 August 25, 2011
The carpet on the inside of the sidescreen box is complete.
The finisher set for the sidescreen door is installed,
and the door is fitted before covering. The sidescreen
box top is duplicated as the old board was warped.
Once the top is carefully fitted it is covered with
padding and vinyl. The rear chrome seat brackets are
now installed.
August 25, 2011
The carpet on the inside of the sidescreen box is complete.
The finisher set for the sidescreen door is installed,
and the door is fitted before covering. The sidescreen
box top is duplicated as the old board was warped.
Once the top is carefully fitted it is covered with
padding and vinyl. The rear chrome seat brackets are
now installed.
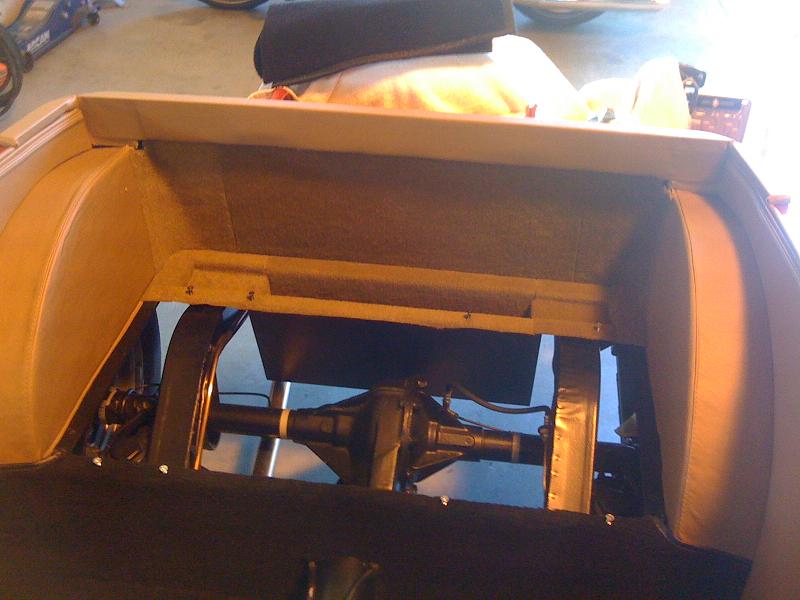
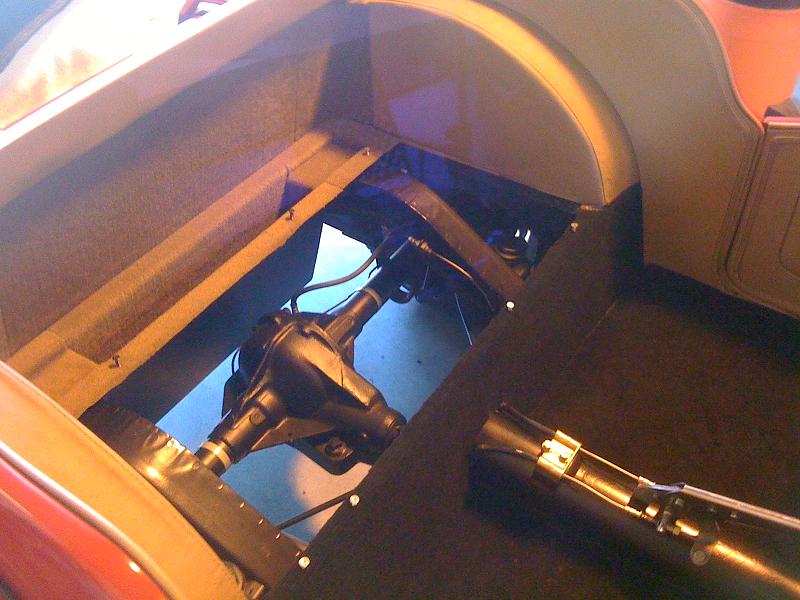
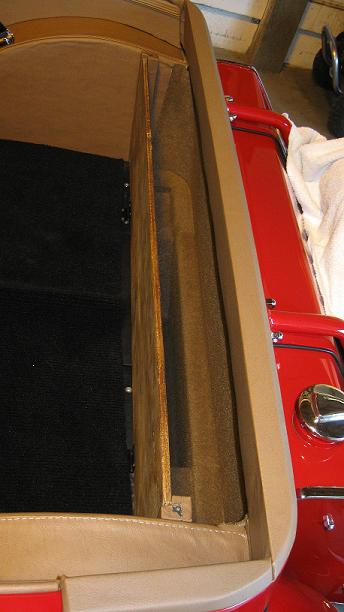
 Also August 25,
2011 The sidescreen box door is covered, straps
installed, marine grade carpet glued to the inside and
installed in the car. The rear carpet covering the
panel assembly over the axle is cut to fit, and the seats
are placed back into the car.
Also August 25,
2011 The sidescreen box door is covered, straps
installed, marine grade carpet glued to the inside and
installed in the car. The rear carpet covering the
panel assembly over the axle is cut to fit, and the seats
are placed back into the car.

 September 24, 2011 Padding
placed between the gas tank end plates and the tank. I
used some thick automotive carpet padding. Some say
this pad is not needed. Because my car should never
get wet I think this padding will work fine.
September 24, 2011 Padding
placed between the gas tank end plates and the tank. I
used some thick automotive carpet padding. Some say
this pad is not needed. Because my car should never
get wet I think this padding will work fine.
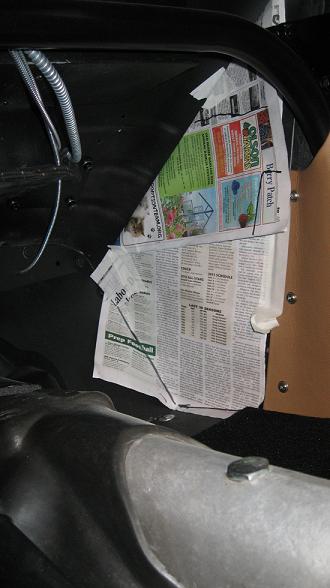
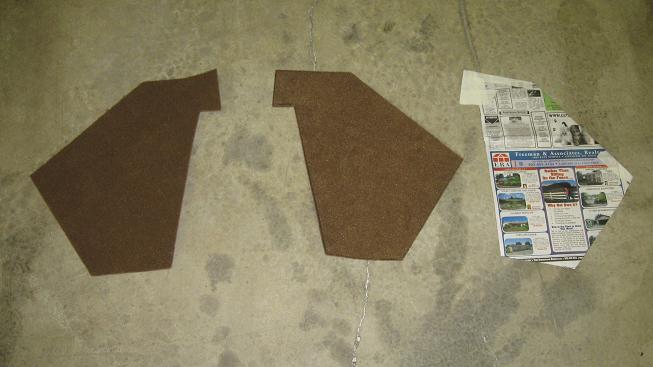
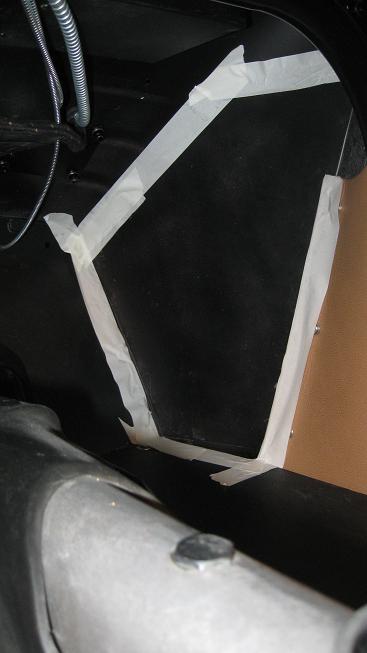
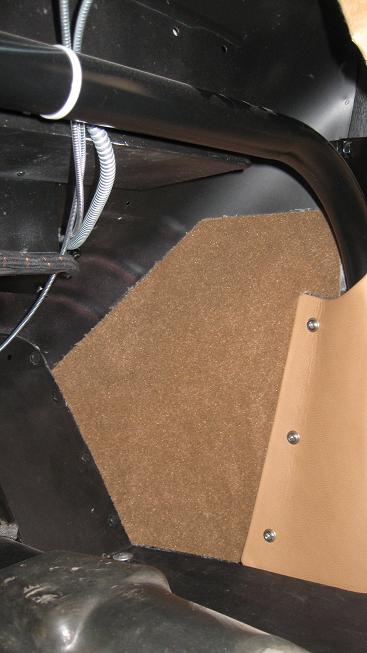
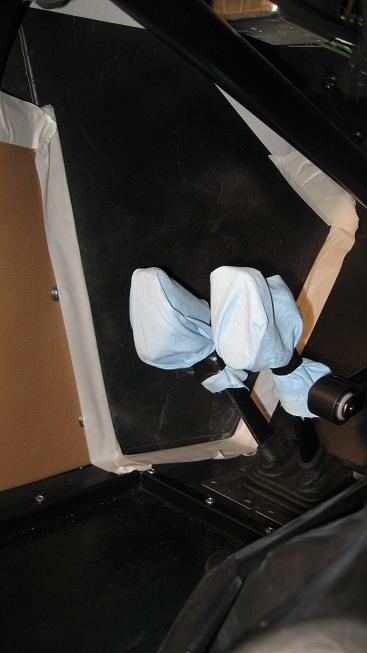
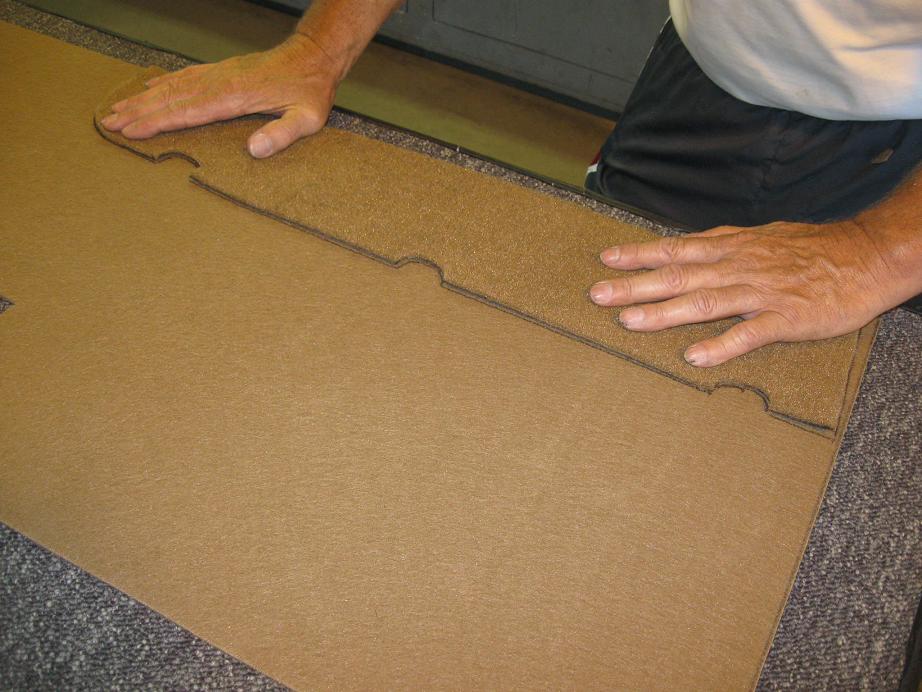
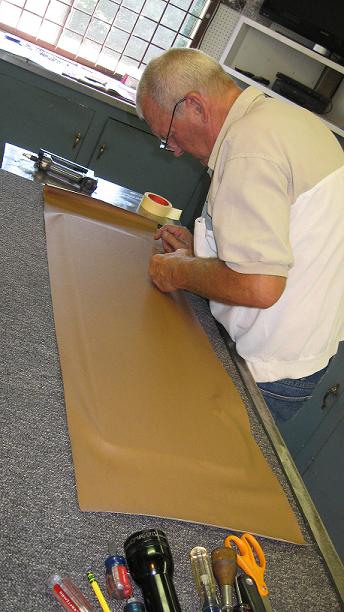
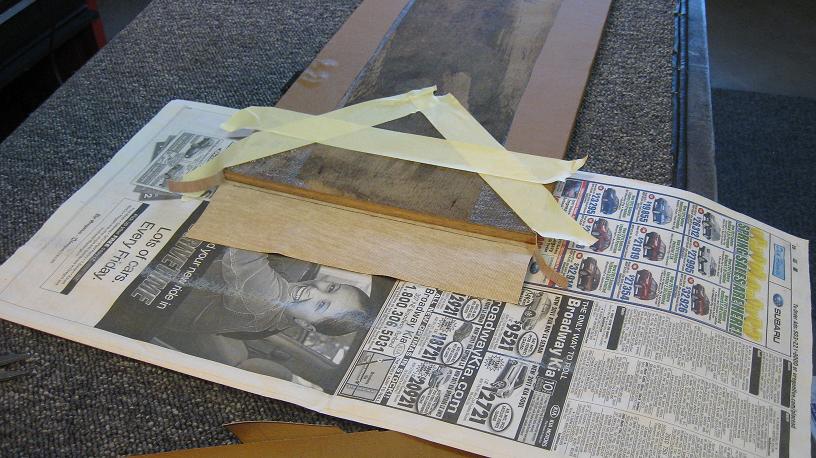
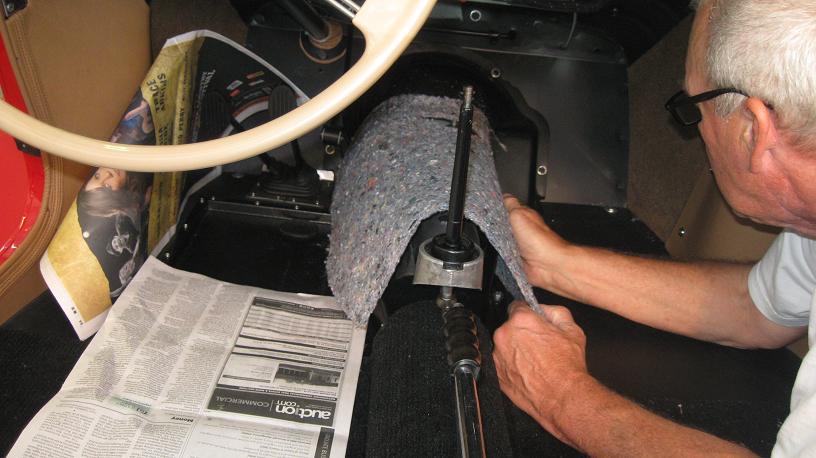
 September 27, 2011
I decided to cover my front bulkhead sides, near the
kickplate, with marine grade carpet. This is the same
carpet we used in the sidescreen box. I started by
making a template out of newspaper and transfered it to the
carpet. I also got the fume excluder screwed down to
the floor boards.
September 27, 2011
I decided to cover my front bulkhead sides, near the
kickplate, with marine grade carpet. This is the same
carpet we used in the sidescreen box. I started by
making a template out of newspaper and transfered it to the
carpet. I also got the fume excluder screwed down to
the floor boards.
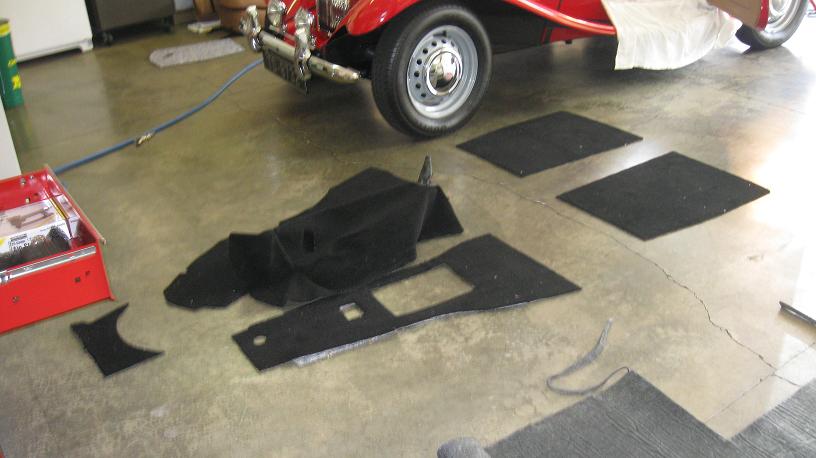
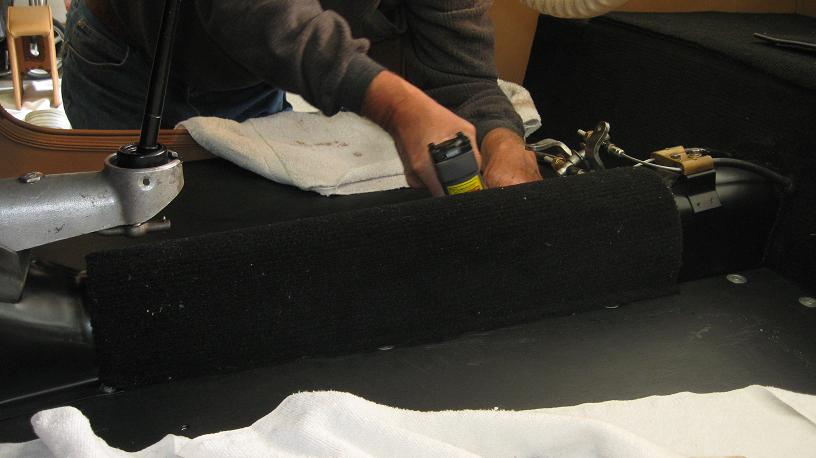

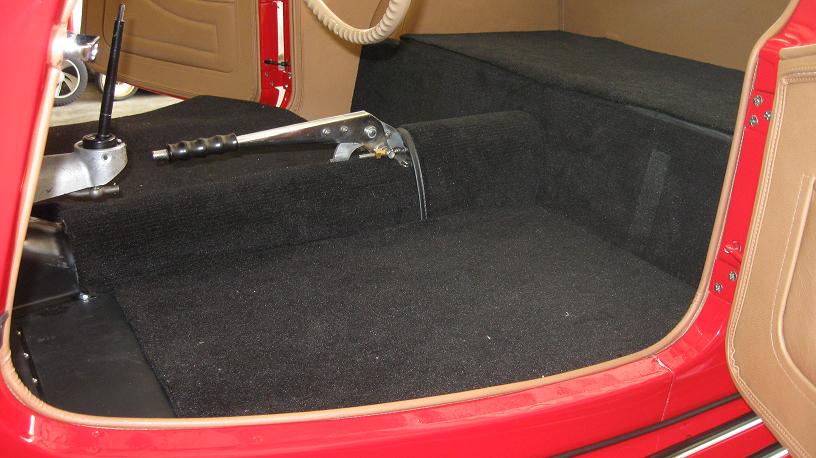
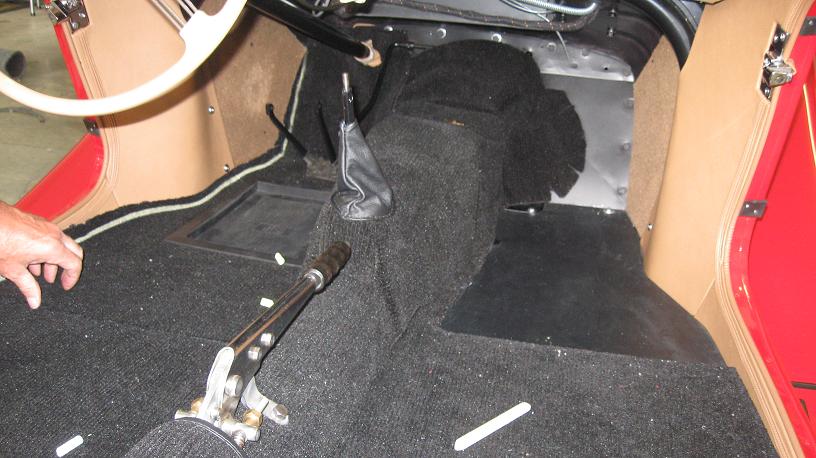
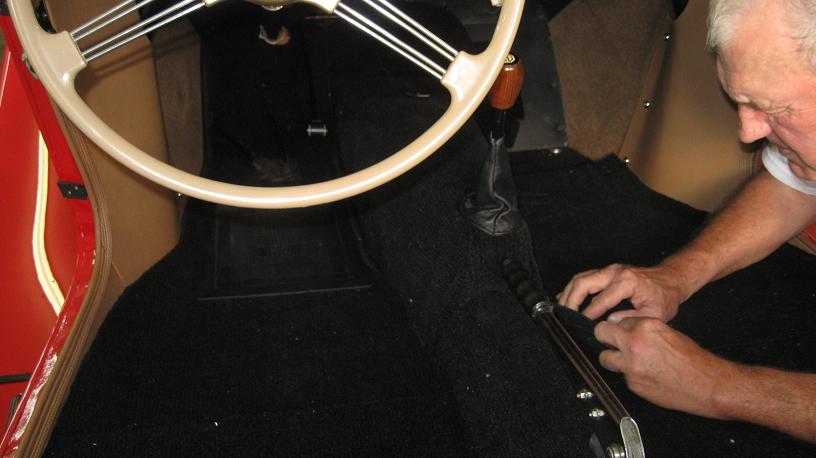
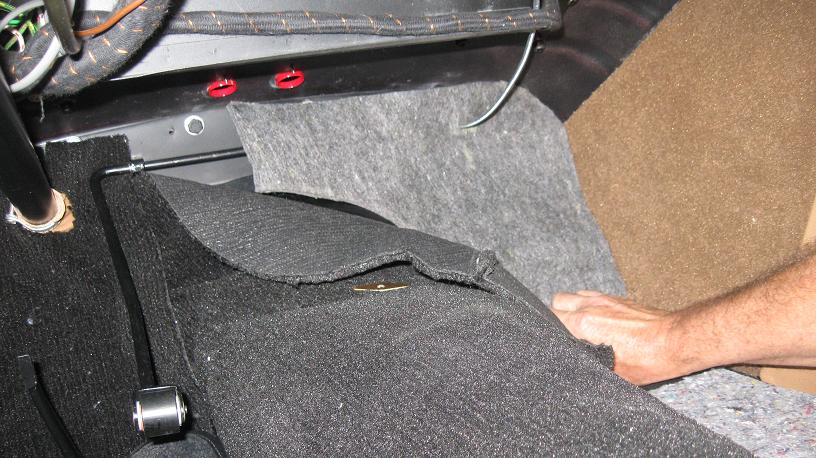
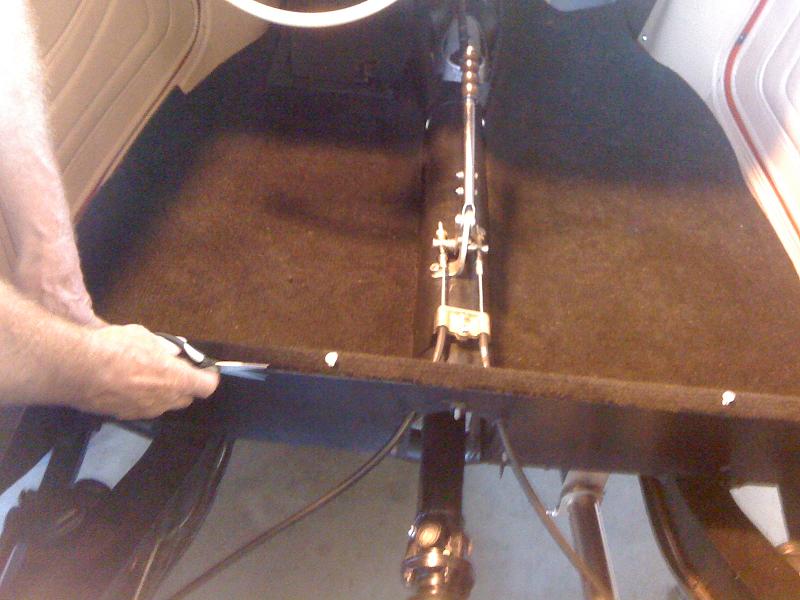
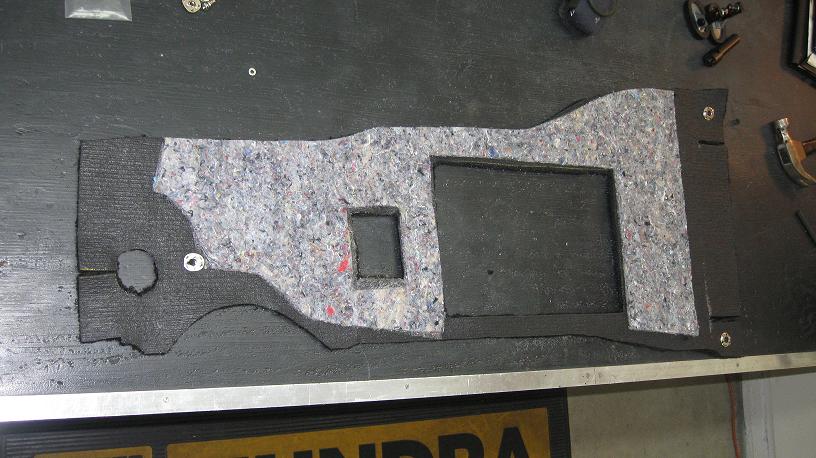
 June 24, 2012 Above
are
pictures of the carpet in the passenger compartment being
installed. We started with the tunnel piece. We
added padding to the tunnel first to help with noise.
We secured the carpet to the floor with a few staples.
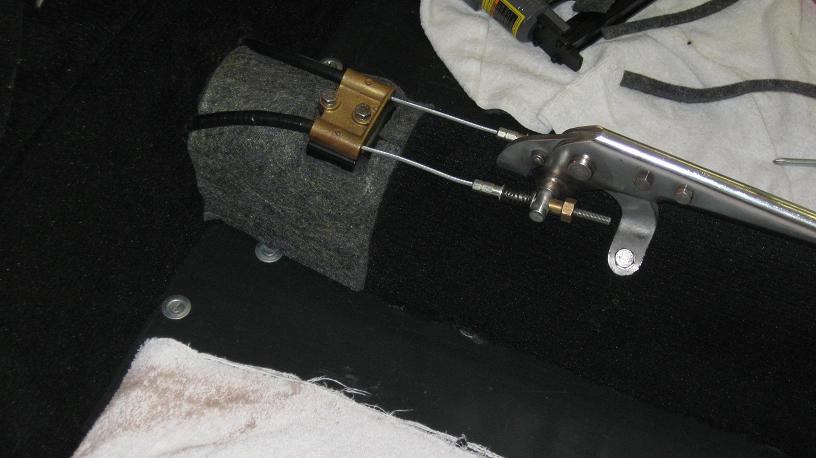
We also added a small piece of padding under the hand brake
mechanism, installed the cable cover, again with a few
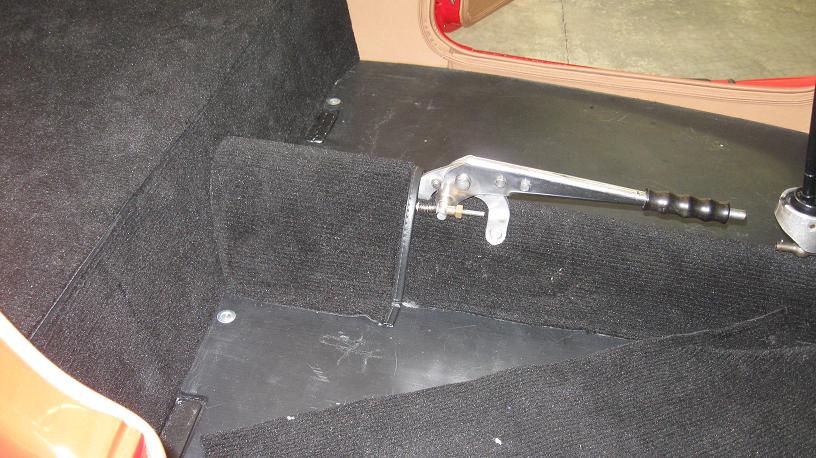
staples to hold it in place. Next we fitted the back
carpet that would eventually be under the seat. Then
we took on the transmission tunnel cover. We used the
supplied piece of padding in the kit and added a few pieces
of our own to help keep the cover firm. We secured the
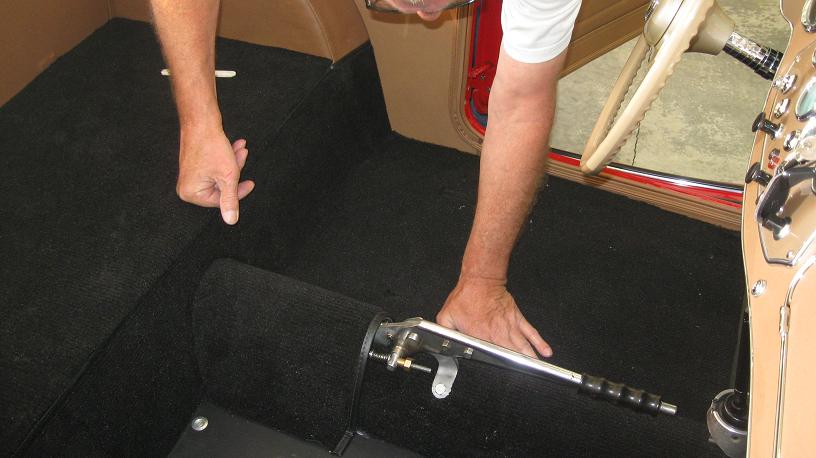
sides with a couple staples to the floor boards. Next
we fitted the driver’s side carpet piece with the supplied
padding. We did the passengers side carpet next with
the supplied piece of padding. We added an extra piece
of padding to continue the padding all the way up the
bulkhead. We have yet to install the front bulkhead
cover above the transmission. Once everything is in
position we will go back and secure the carpet to the floor
with the supplied "Veltex" carpet rings & snaps.
We dropped the seats back in place and notched out the
carpet so we could mount them to the floor. We notched
out the carpet where the adjusters protrude in the front for
a nice clean look.
June 24, 2012 Above
are
pictures of the carpet in the passenger compartment being
installed. We started with the tunnel piece. We
added padding to the tunnel first to help with noise.
We secured the carpet to the floor with a few staples.
We also added a small piece of padding under the hand brake
mechanism, installed the cable cover, again with a few
staples to hold it in place. Next we fitted the back
carpet that would eventually be under the seat. Then
we took on the transmission tunnel cover. We used the
supplied piece of padding in the kit and added a few pieces
of our own to help keep the cover firm. We secured the
sides with a couple staples to the floor boards. Next
we fitted the driver’s side carpet piece with the supplied
padding. We did the passengers side carpet next with
the supplied piece of padding. We added an extra piece
of padding to continue the padding all the way up the
bulkhead. We have yet to install the front bulkhead
cover above the transmission. Once everything is in
position we will go back and secure the carpet to the floor
with the supplied "Veltex" carpet rings & snaps.
We dropped the seats back in place and notched out the
carpet so we could mount them to the floor. We notched
out the carpet where the adjusters protrude in the front for
a nice clean look.
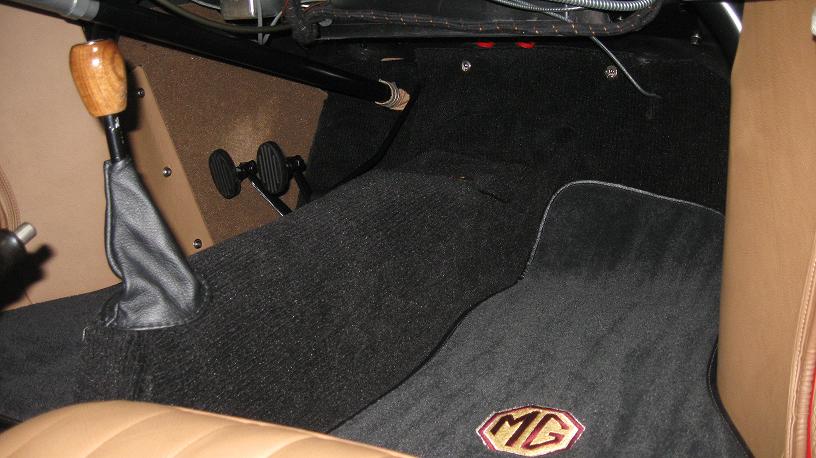
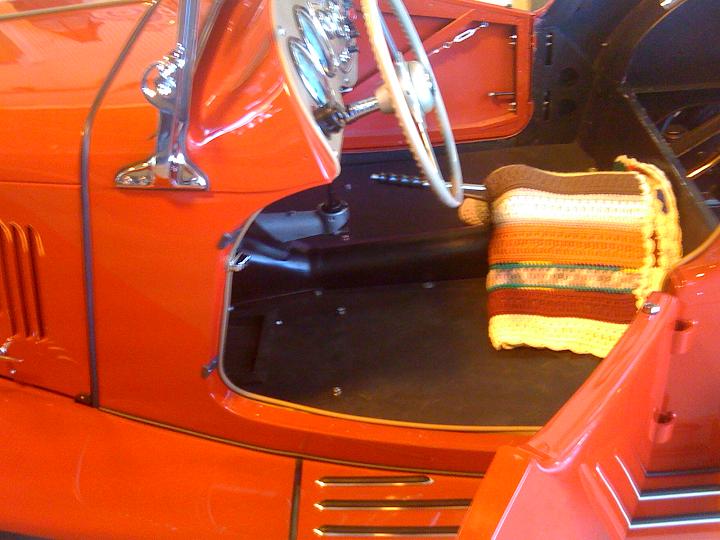
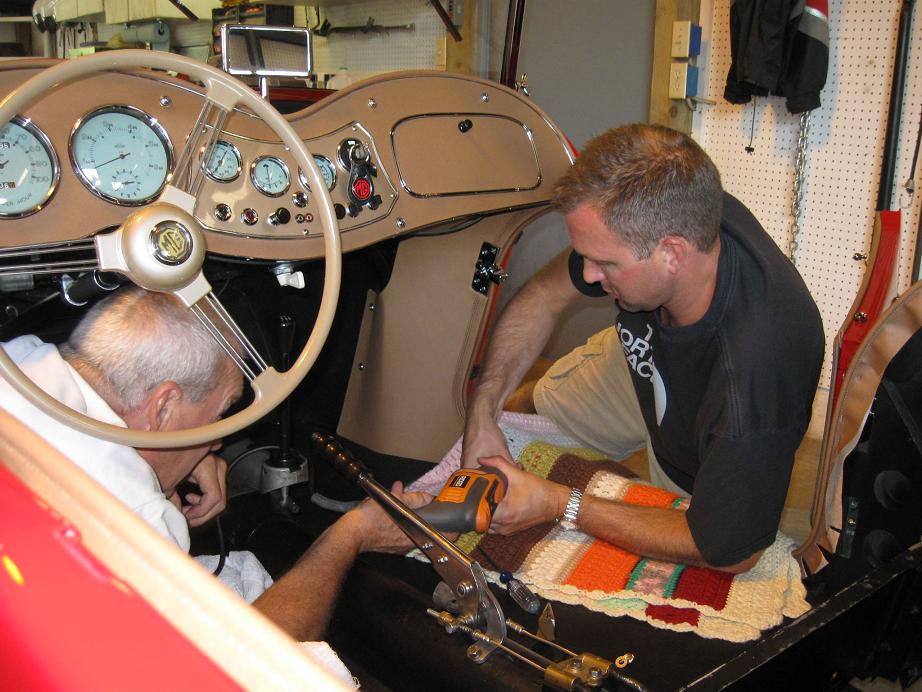
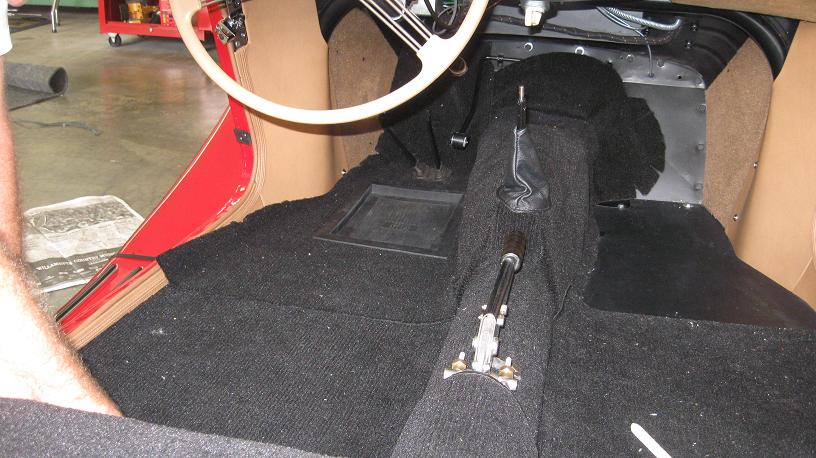
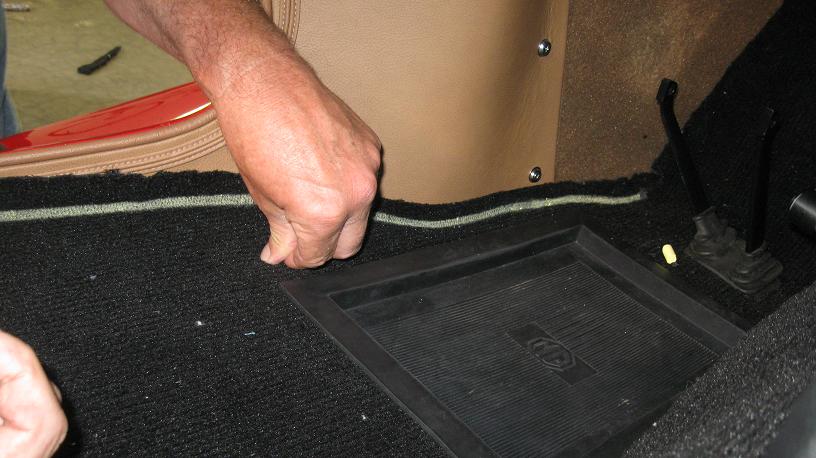
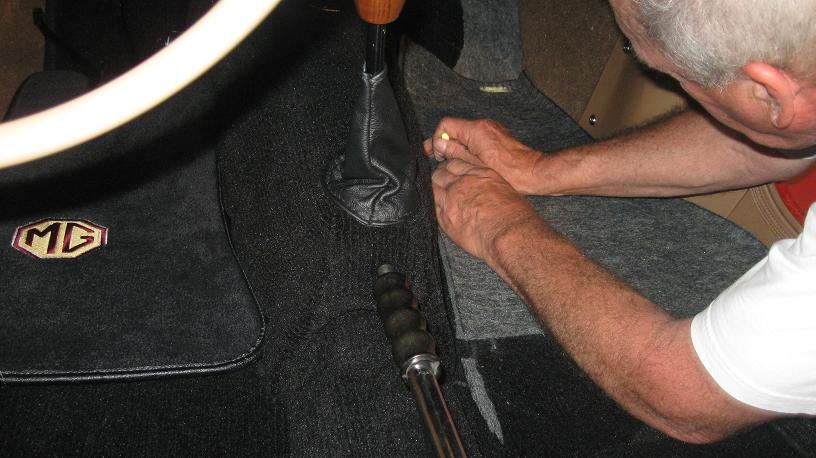
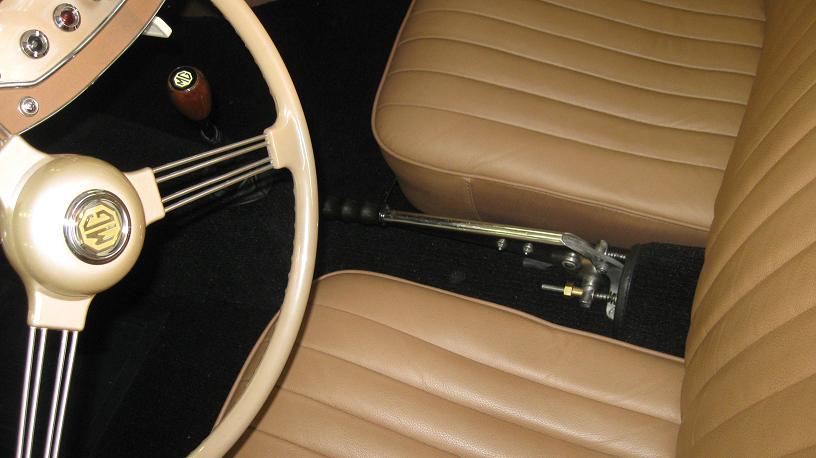
July 1, 2012 Finishing of the
carpet today! We screwed the snaps that will hold the
driver and passengers carpet in place directly through the
piece of carpet that goes under the seat. We added a
pad under the footwell rubber for a nice snug fit. The
lift the dot studs and snaps were installed to hold the
front carpet pieces against the bulkhead. Everything
was put down neatly and the ultra plush MG logo mats were
put in place!
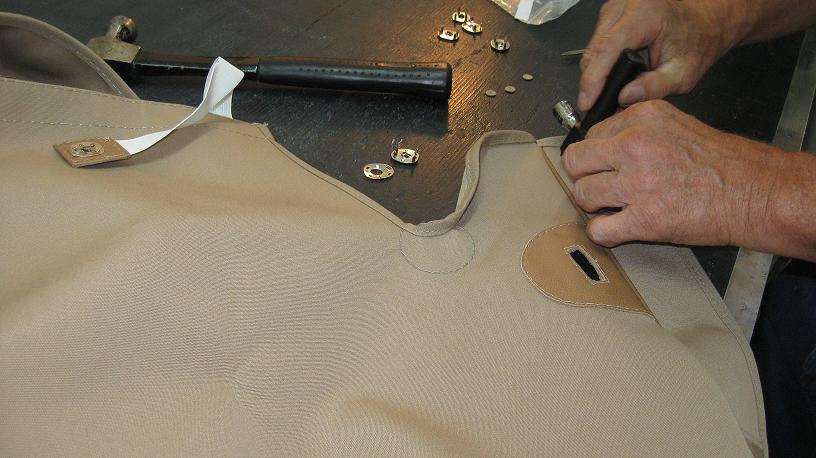
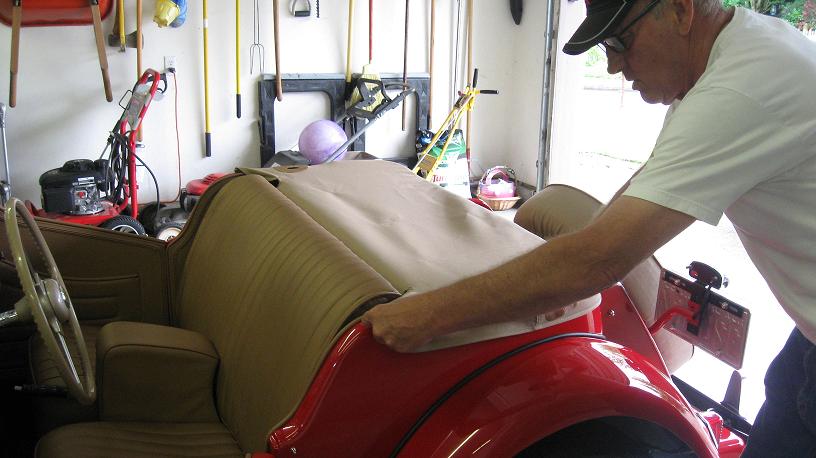
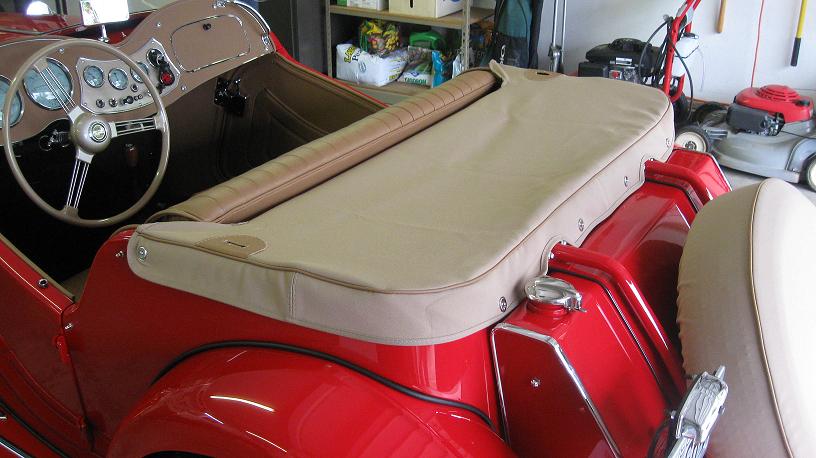 Also today we started the install of the rear 1/2
tonneau. The lift the dot snaps and studs are in
place. We may need to add a couple more studs to the
car for a better fit. The straps that hold the front
of the cover snug have yet to be fastened.
Also today we started the install of the rear 1/2
tonneau. The lift the dot snaps and studs are in
place. We may need to add a couple more studs to the
car for a better fit. The straps that hold the front
of the cover snug have yet to be fastened.
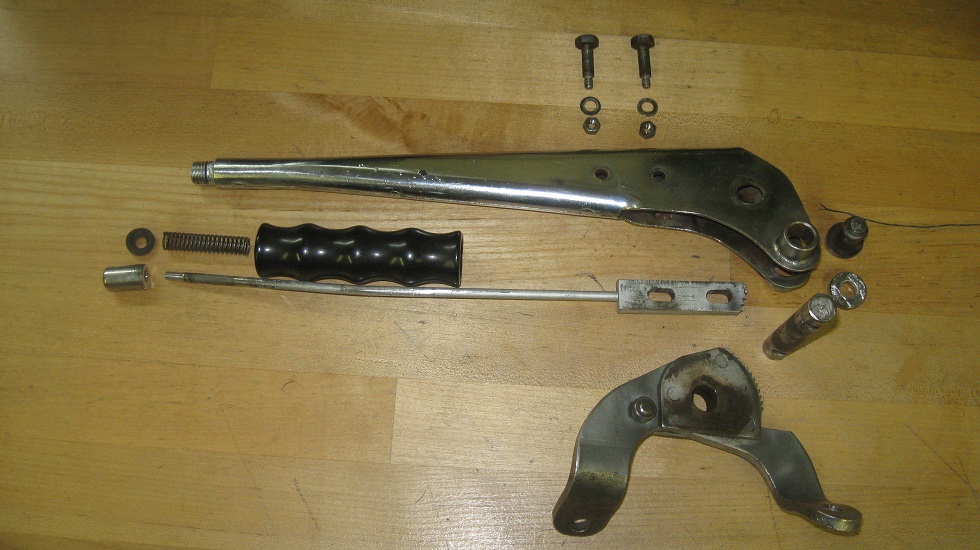
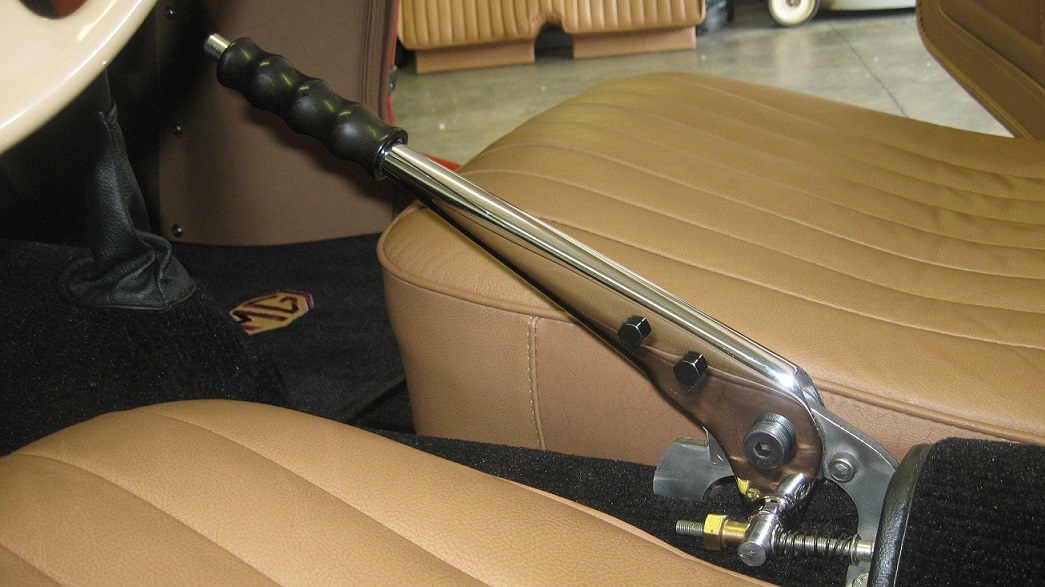

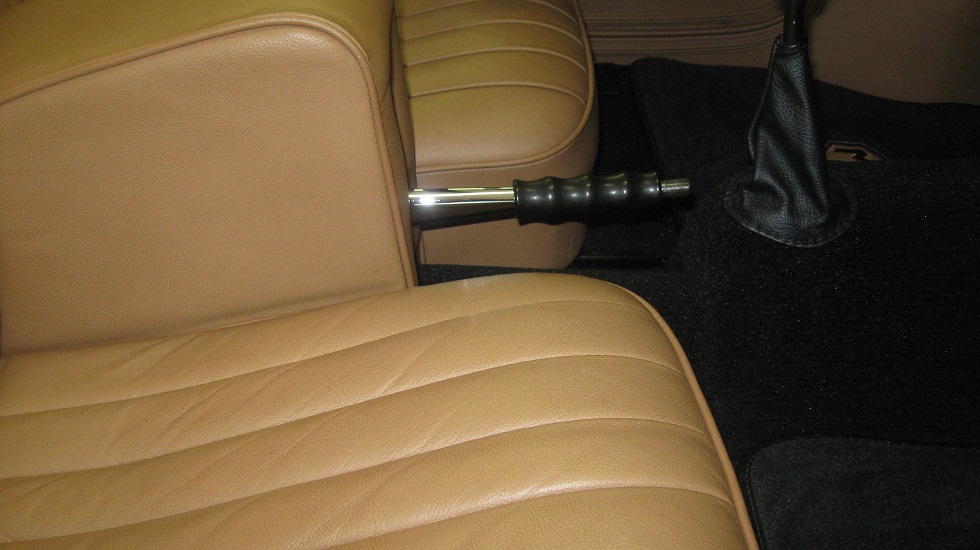 May 10, 2013 Some
finishing
touches to the interior. I finally pulled the
emergency brake handle out of the car and sent it down to be
rechromed. I pulled the original rivet out and
replaced it with a allen head shoulder bolt with a nyloc nut
and chrome spacer. Once the arm rest is in place you
can't see that the original rivet was not replaced.
Page created by Rich
King
May 10, 2013 Some
finishing
touches to the interior. I finally pulled the
emergency brake handle out of the car and sent it down to be
rechromed. I pulled the original rivet out and
replaced it with a allen head shoulder bolt with a nyloc nut
and chrome spacer. Once the arm rest is in place you
can't see that the original rivet was not replaced.
Page created by Rich
King

